
Video Recording Block
What is the Video Screener Block?
The Video Screener Block within the Qatalyst app serves as a dedicated tool for testers to record and submit videos as part of their testing process. This block allows users to integrate video-based insights into their tests effortlessly. Whether it's capturing user interactions, feedback, or suggestions, this feature adds a rich layer to the testing process, providing a holistic understanding of user experiences.
How to Utilize the Video Screener Block
Utilizing the Video Screener Block in the Qatalyst app is straightforward. Testers can easily add this block to their testing sequences, prompting users to record and submit videos based on specified criteria. The intuitive interface ensures a user-friendly experience, allowing for easy navigation and management of video submissions.
Here are the steps for adding a video screener block to the Qatalyst test:
Steps
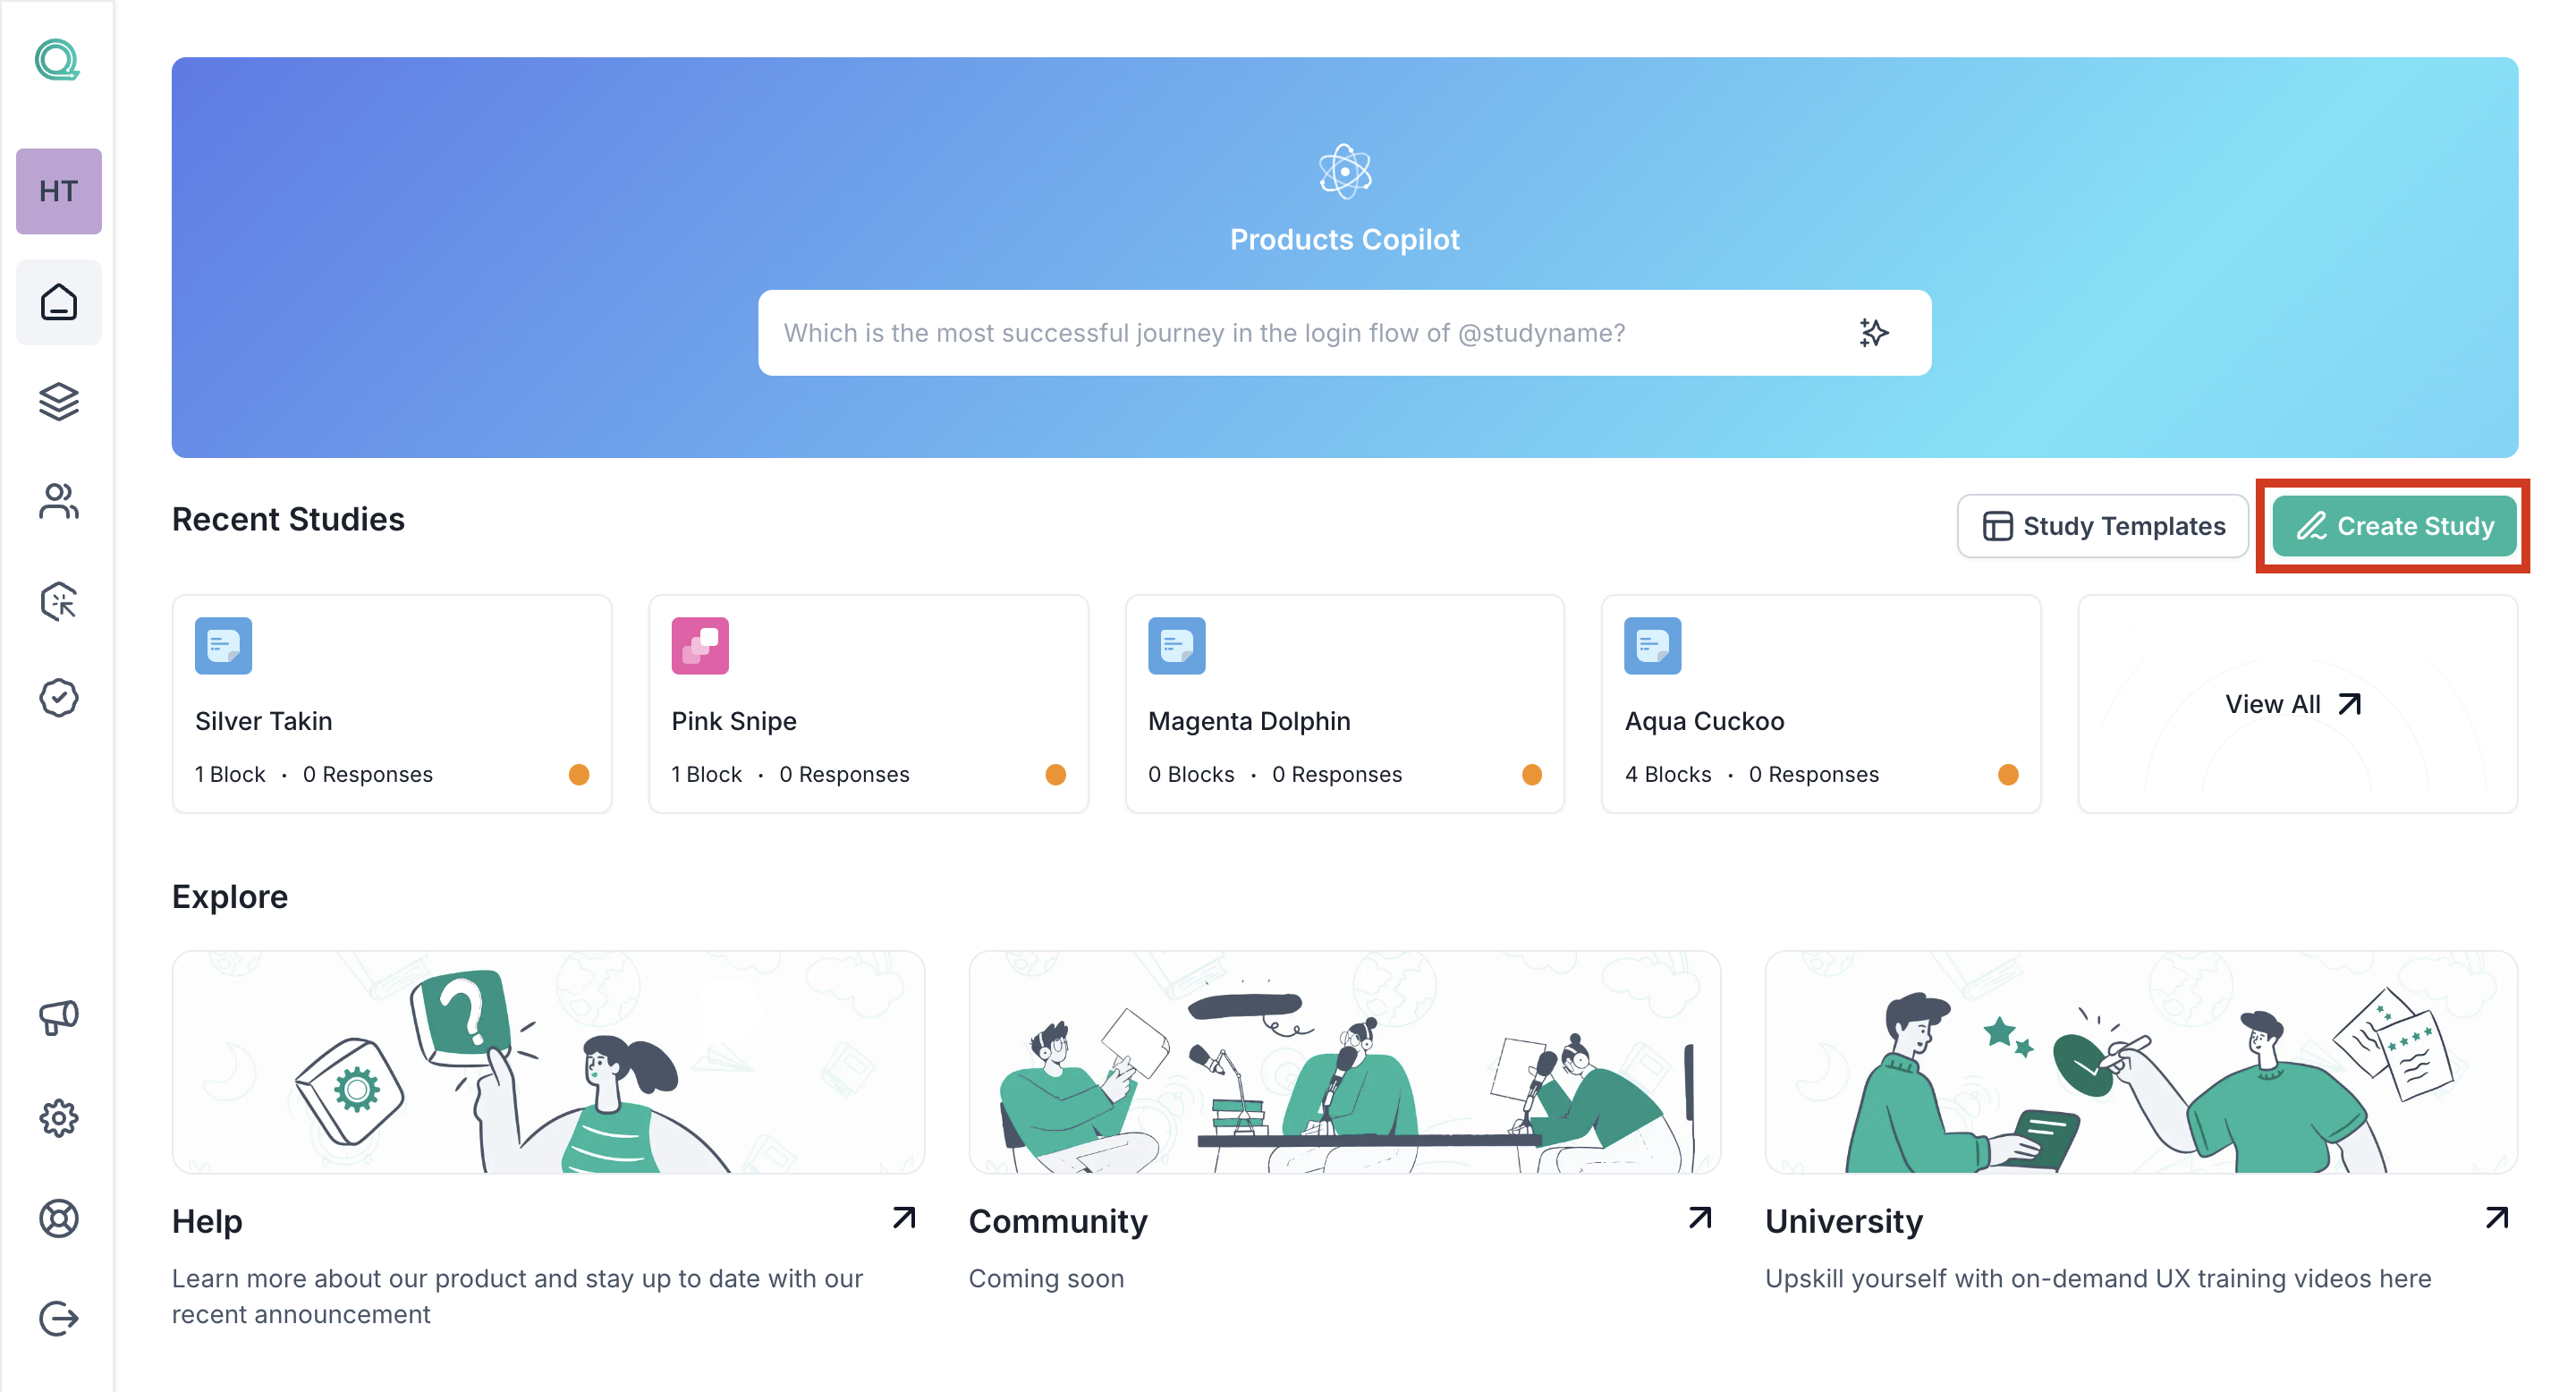
Step 1: Log in to your Qatalyst account, which will direct you to the dashboard. From the dashboard, click on the "Create New Study" button to initiate the process of creating a new study.
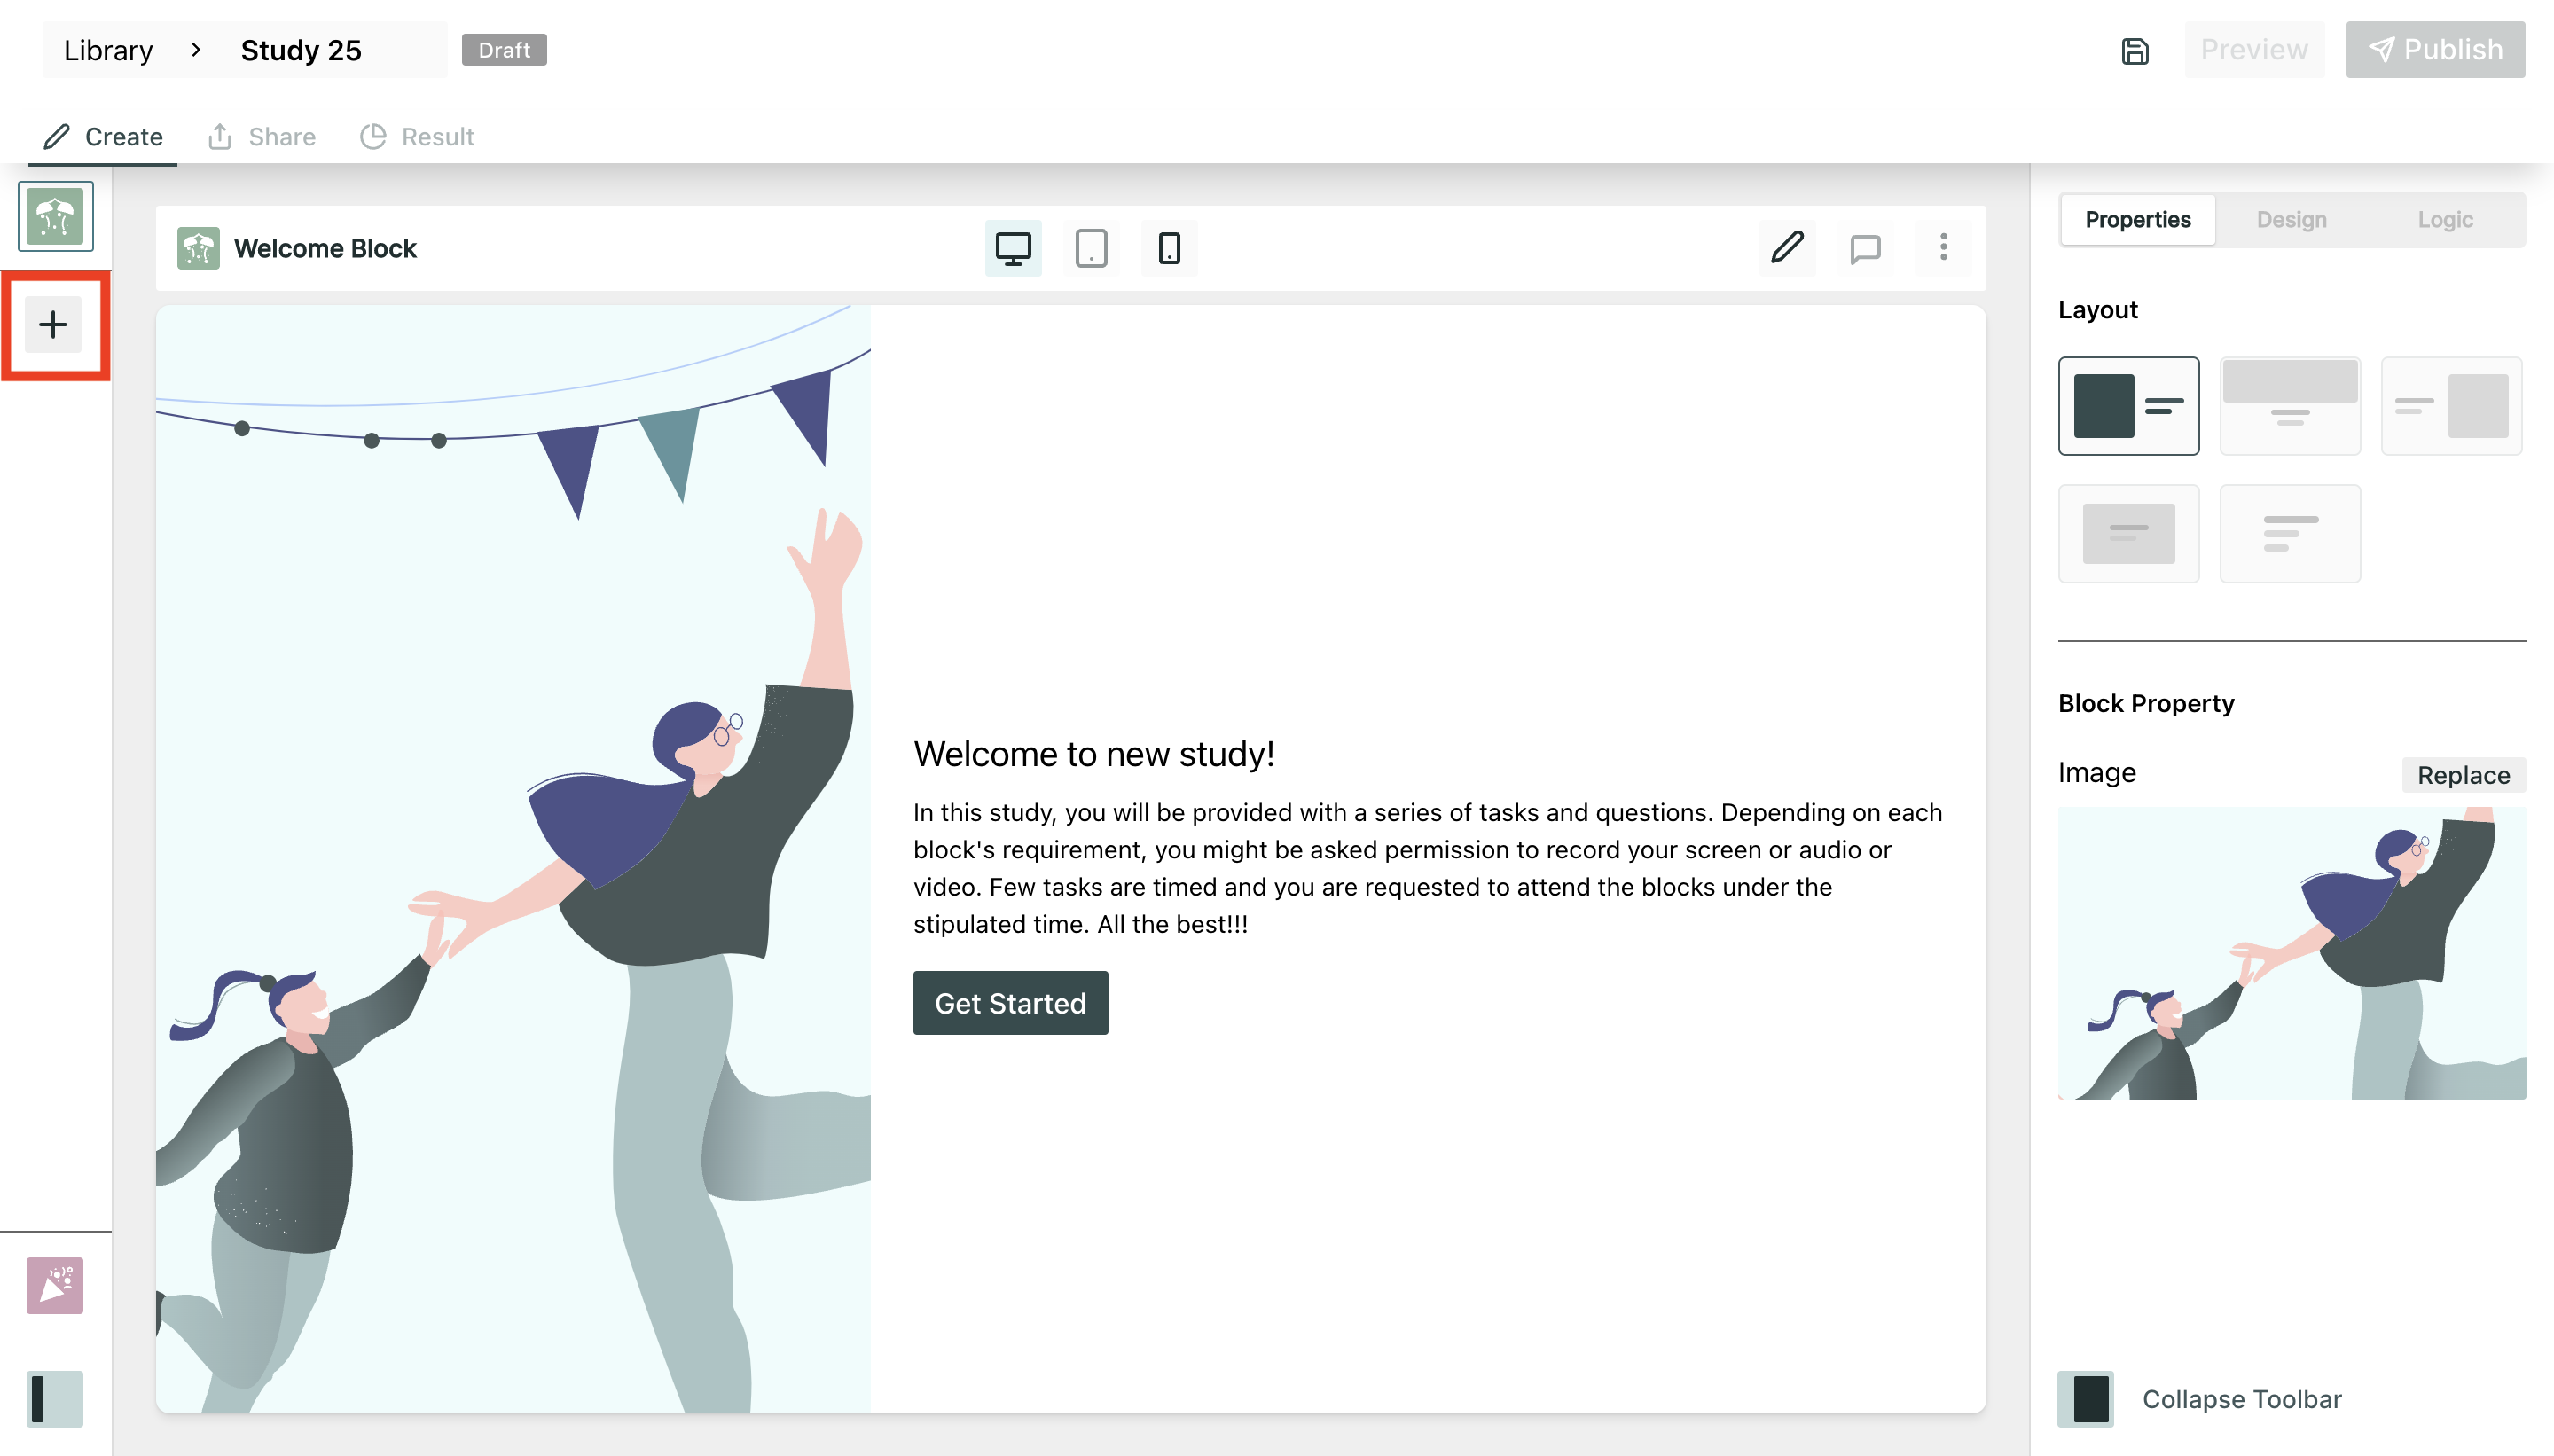
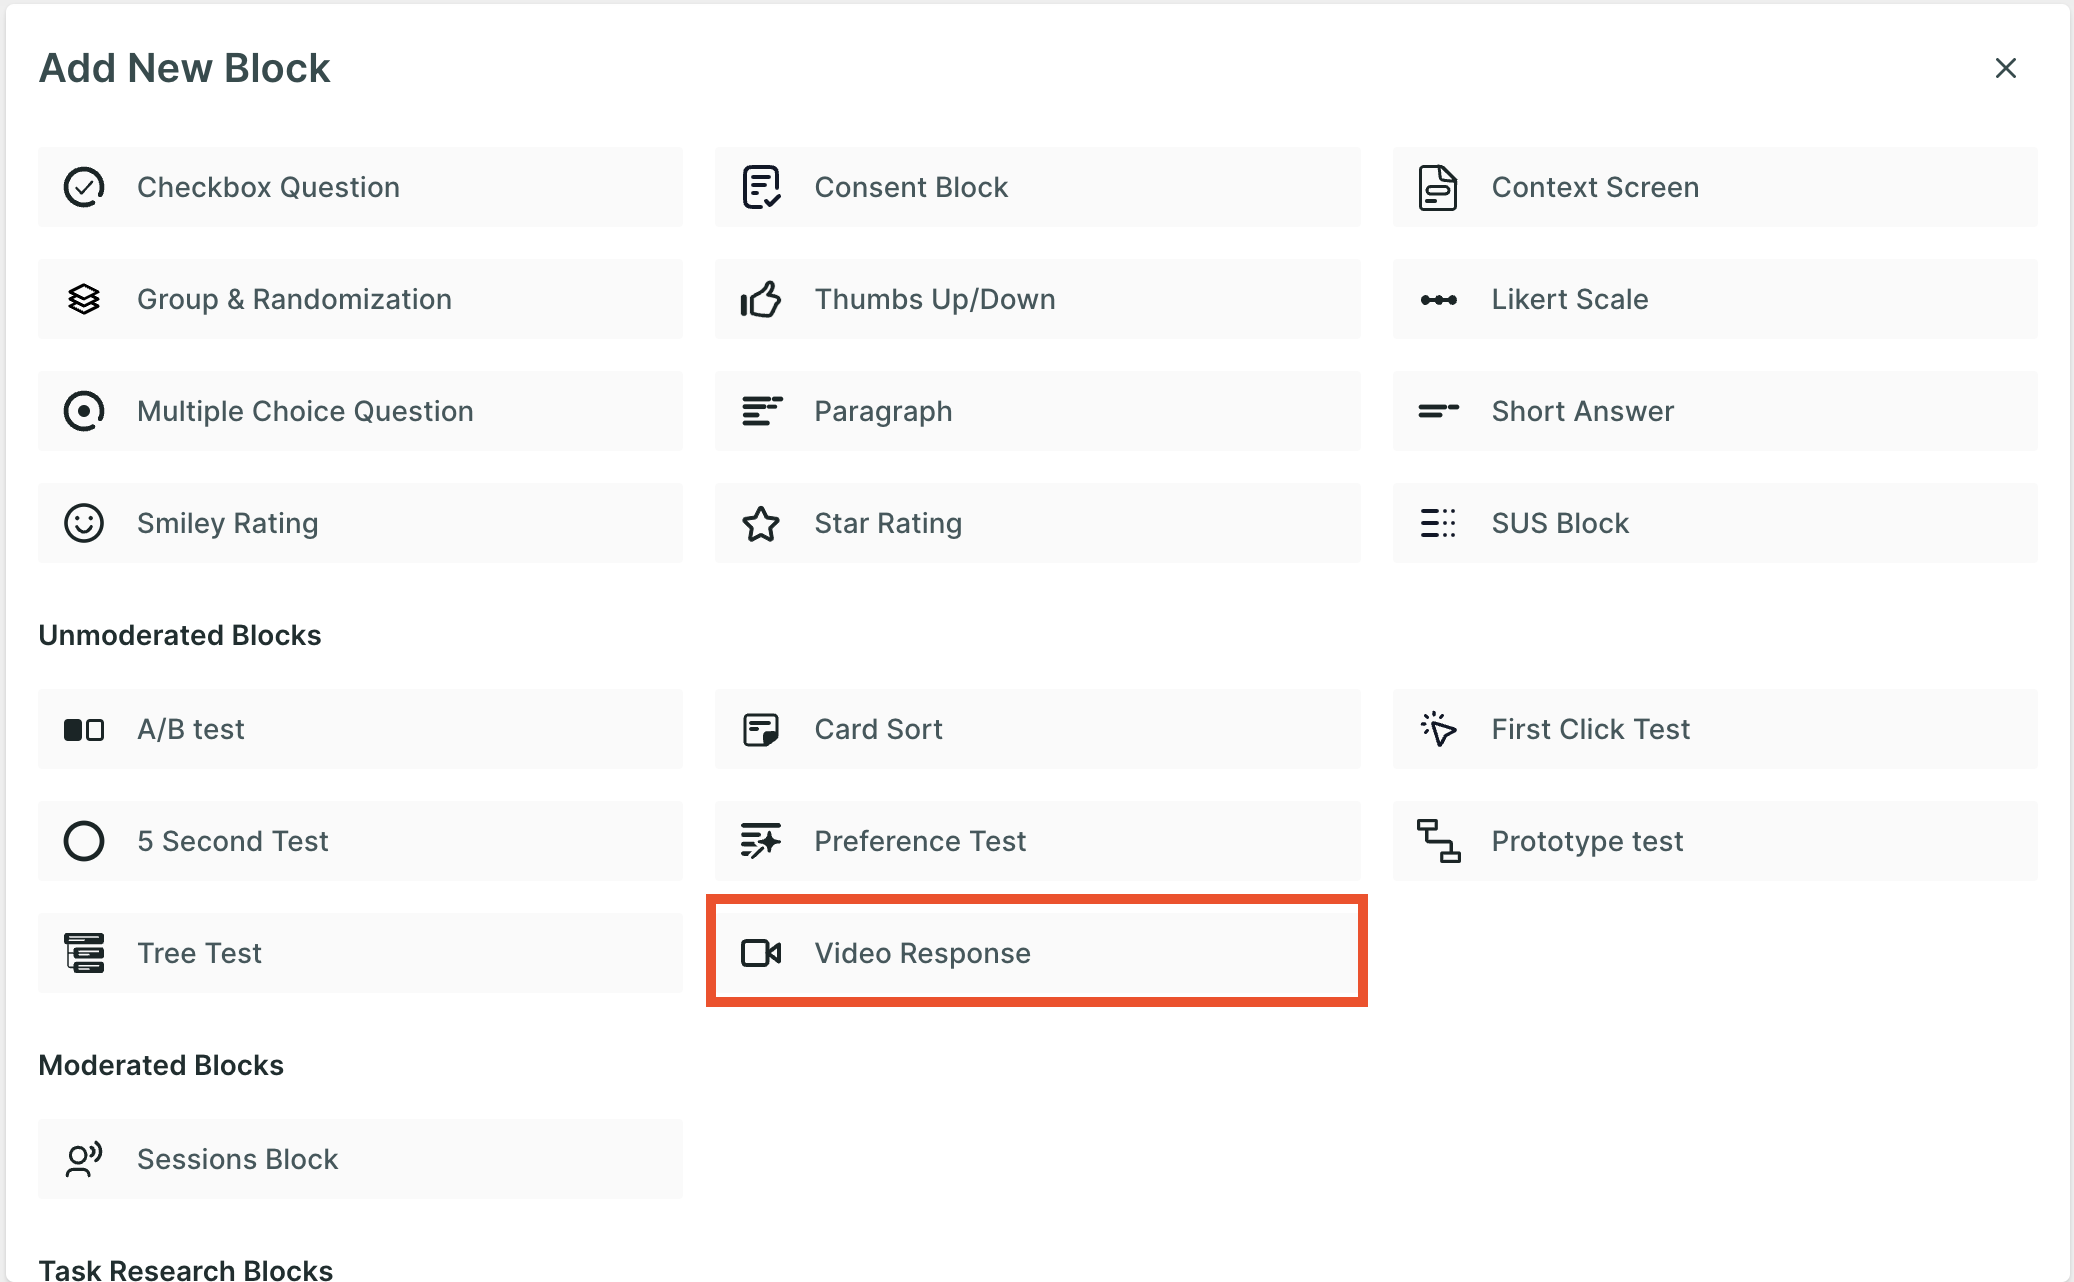
Step 2: Once you're in the study creation interface, locate the "+" button and click on it to add a new block. From the list of options that appear, select the "Video Response Block".
Step 3: Once you have added the block, you can add the title of the task and the description. In the property section, you can define the following:
- Time Limit: maximum time limit for the video recording or uploading.
- Mandatory Test: Taking this test is mandatory; the respondent will not be able to move to another question without taking this test.
- Upload Media: Testers can also upload the media if they do not wish to record it live.
- Preferred Language: Language spoken in the live recording or uploaded media; this selection is important for accurate transcript generation.
Technology
- Facial Coding: Facial coding is a technology that is used to analyze users' facial expressions. in the video, if the face of the user is detected, this technology will give you insights into the expression portrayed by the users.
Step 3: To further enhance your study, continue adding additional survey blocks. Utilize the same process described in Step 2, clicking on the "+" button and selecting different block types to ask a variety of questions related to the test.
Result
Users can access a concise summary of the Video Screener block, providing an overview of the responses within. Users can view the overall summary, view individual testers' responses and seamlessly navigate to a specific tester's view with just a click. We've also added transcripts and analytics, along with the ability to create and manage highlights.
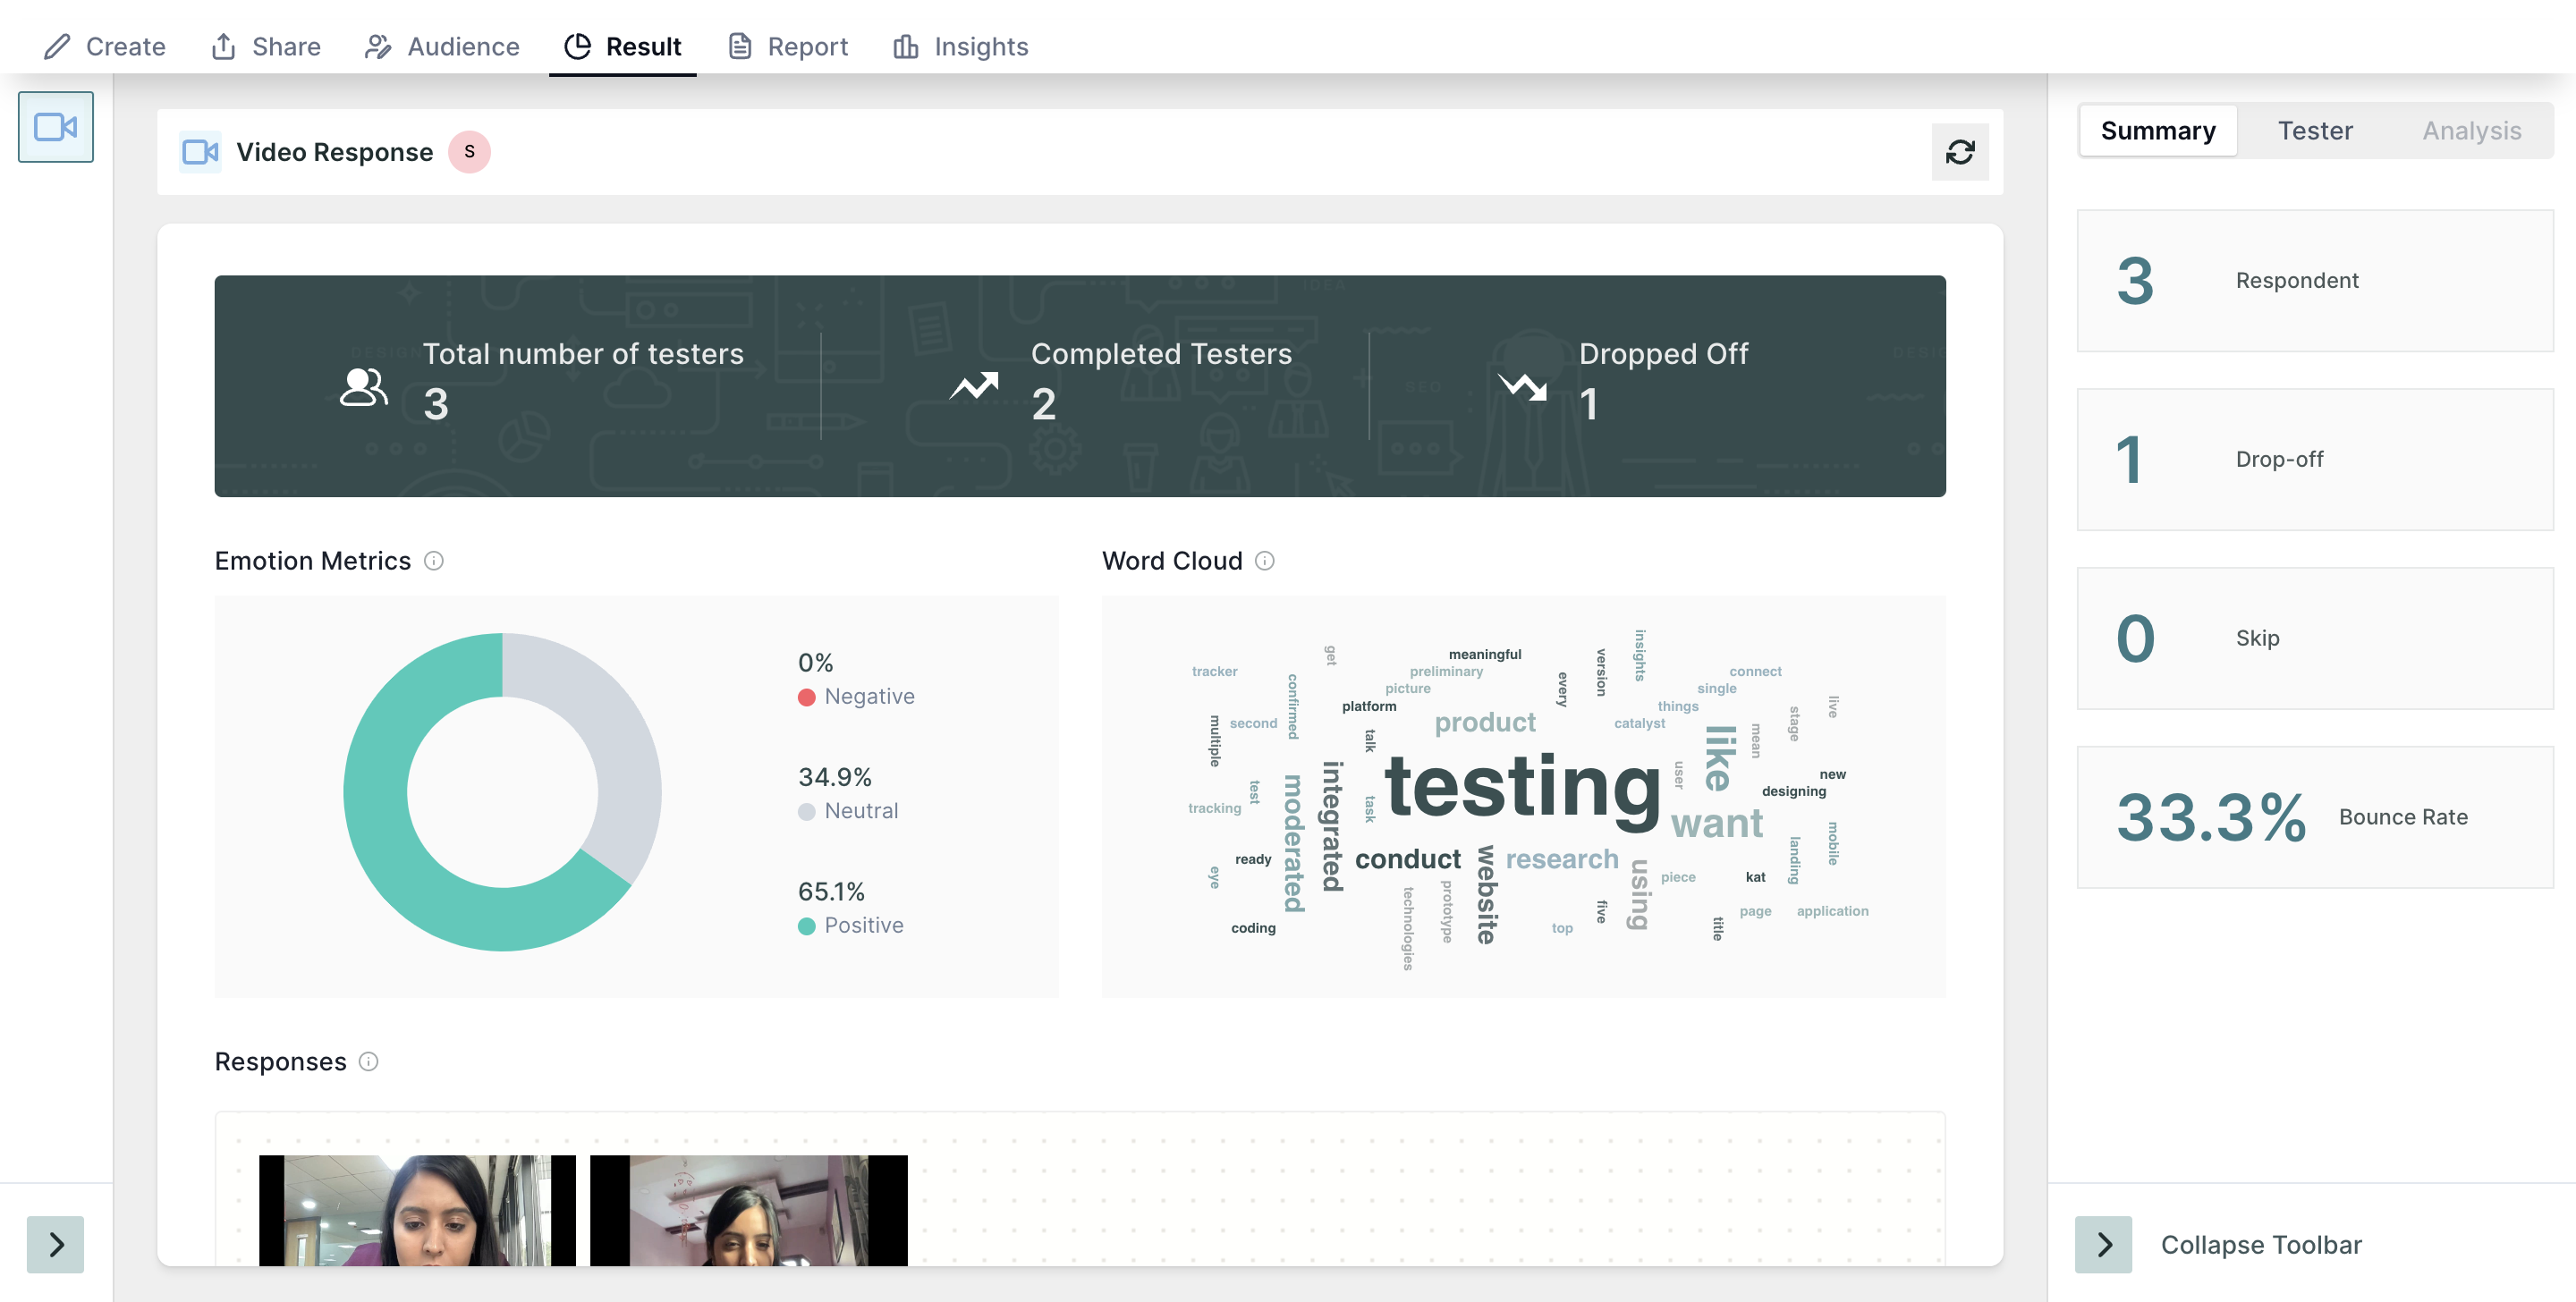
In the summary section on the right hand side of the page, you will find the following information:
- Respondents: Number of people who initiated the test block.
- Skip: The Number of people who choose to skip the block.
- Drop-off: Number of people who have not moved on to the next block.
- Bounce Rate: ((Dropoff + Skip)/ Number of Responses)*100 . (In Percentage)
In the video response summary dashboard, you will get the following information:
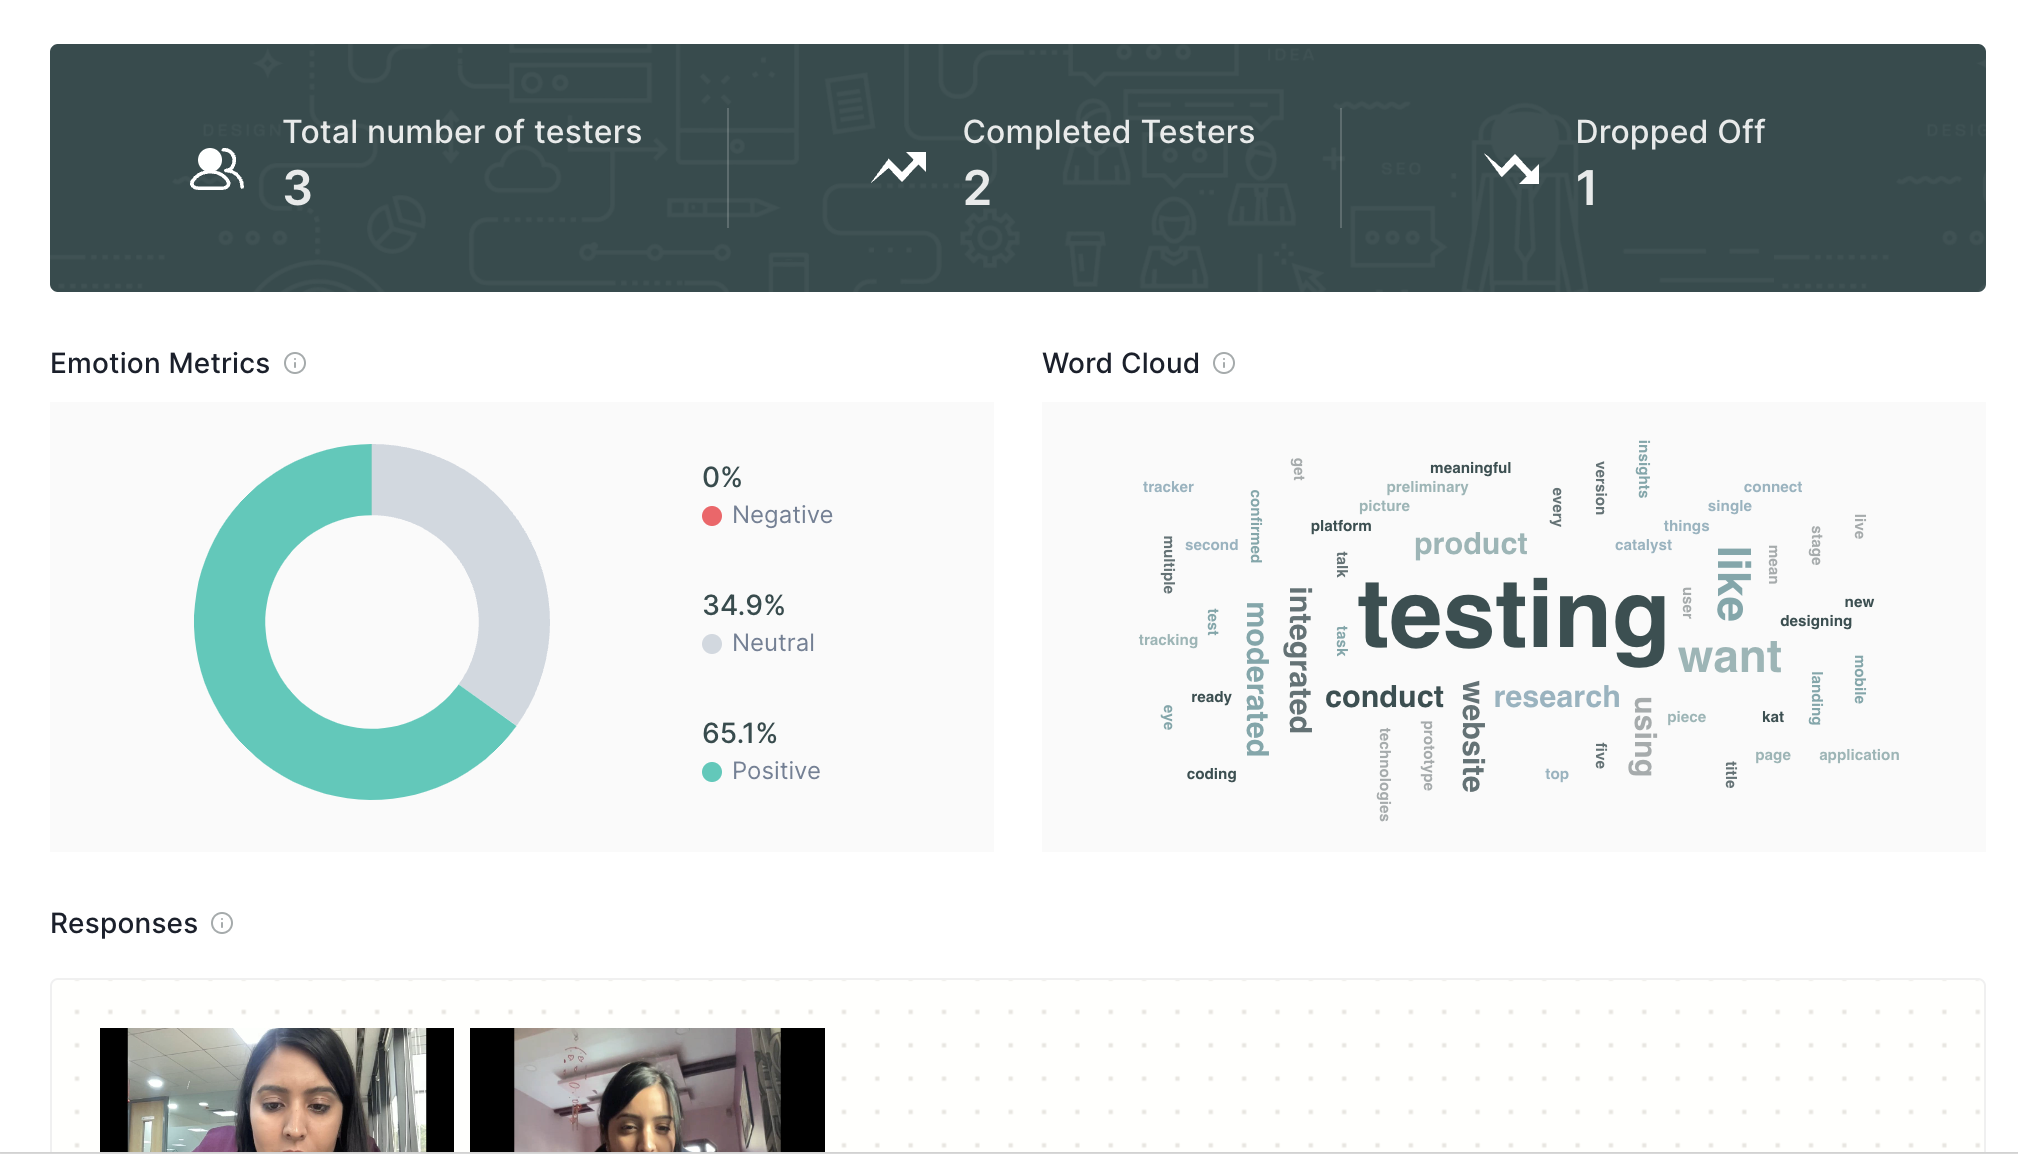
- Total number of testers: The total number of participants in a study.
- Completed Tester: Total number of participants who submitted the response.
- Drop off: Number of users who dropped the test.
- Emotion metrics: An overall percentage distribution of the emotions in the video response submitted.
- Word cloud: A visual representation of the most common words used by participants in their video responses.
Below in the screen, you will find the video responses submitted by the users; you can open and expand it to view the detailed analytics of the particular response. Here, you will find the following insights:
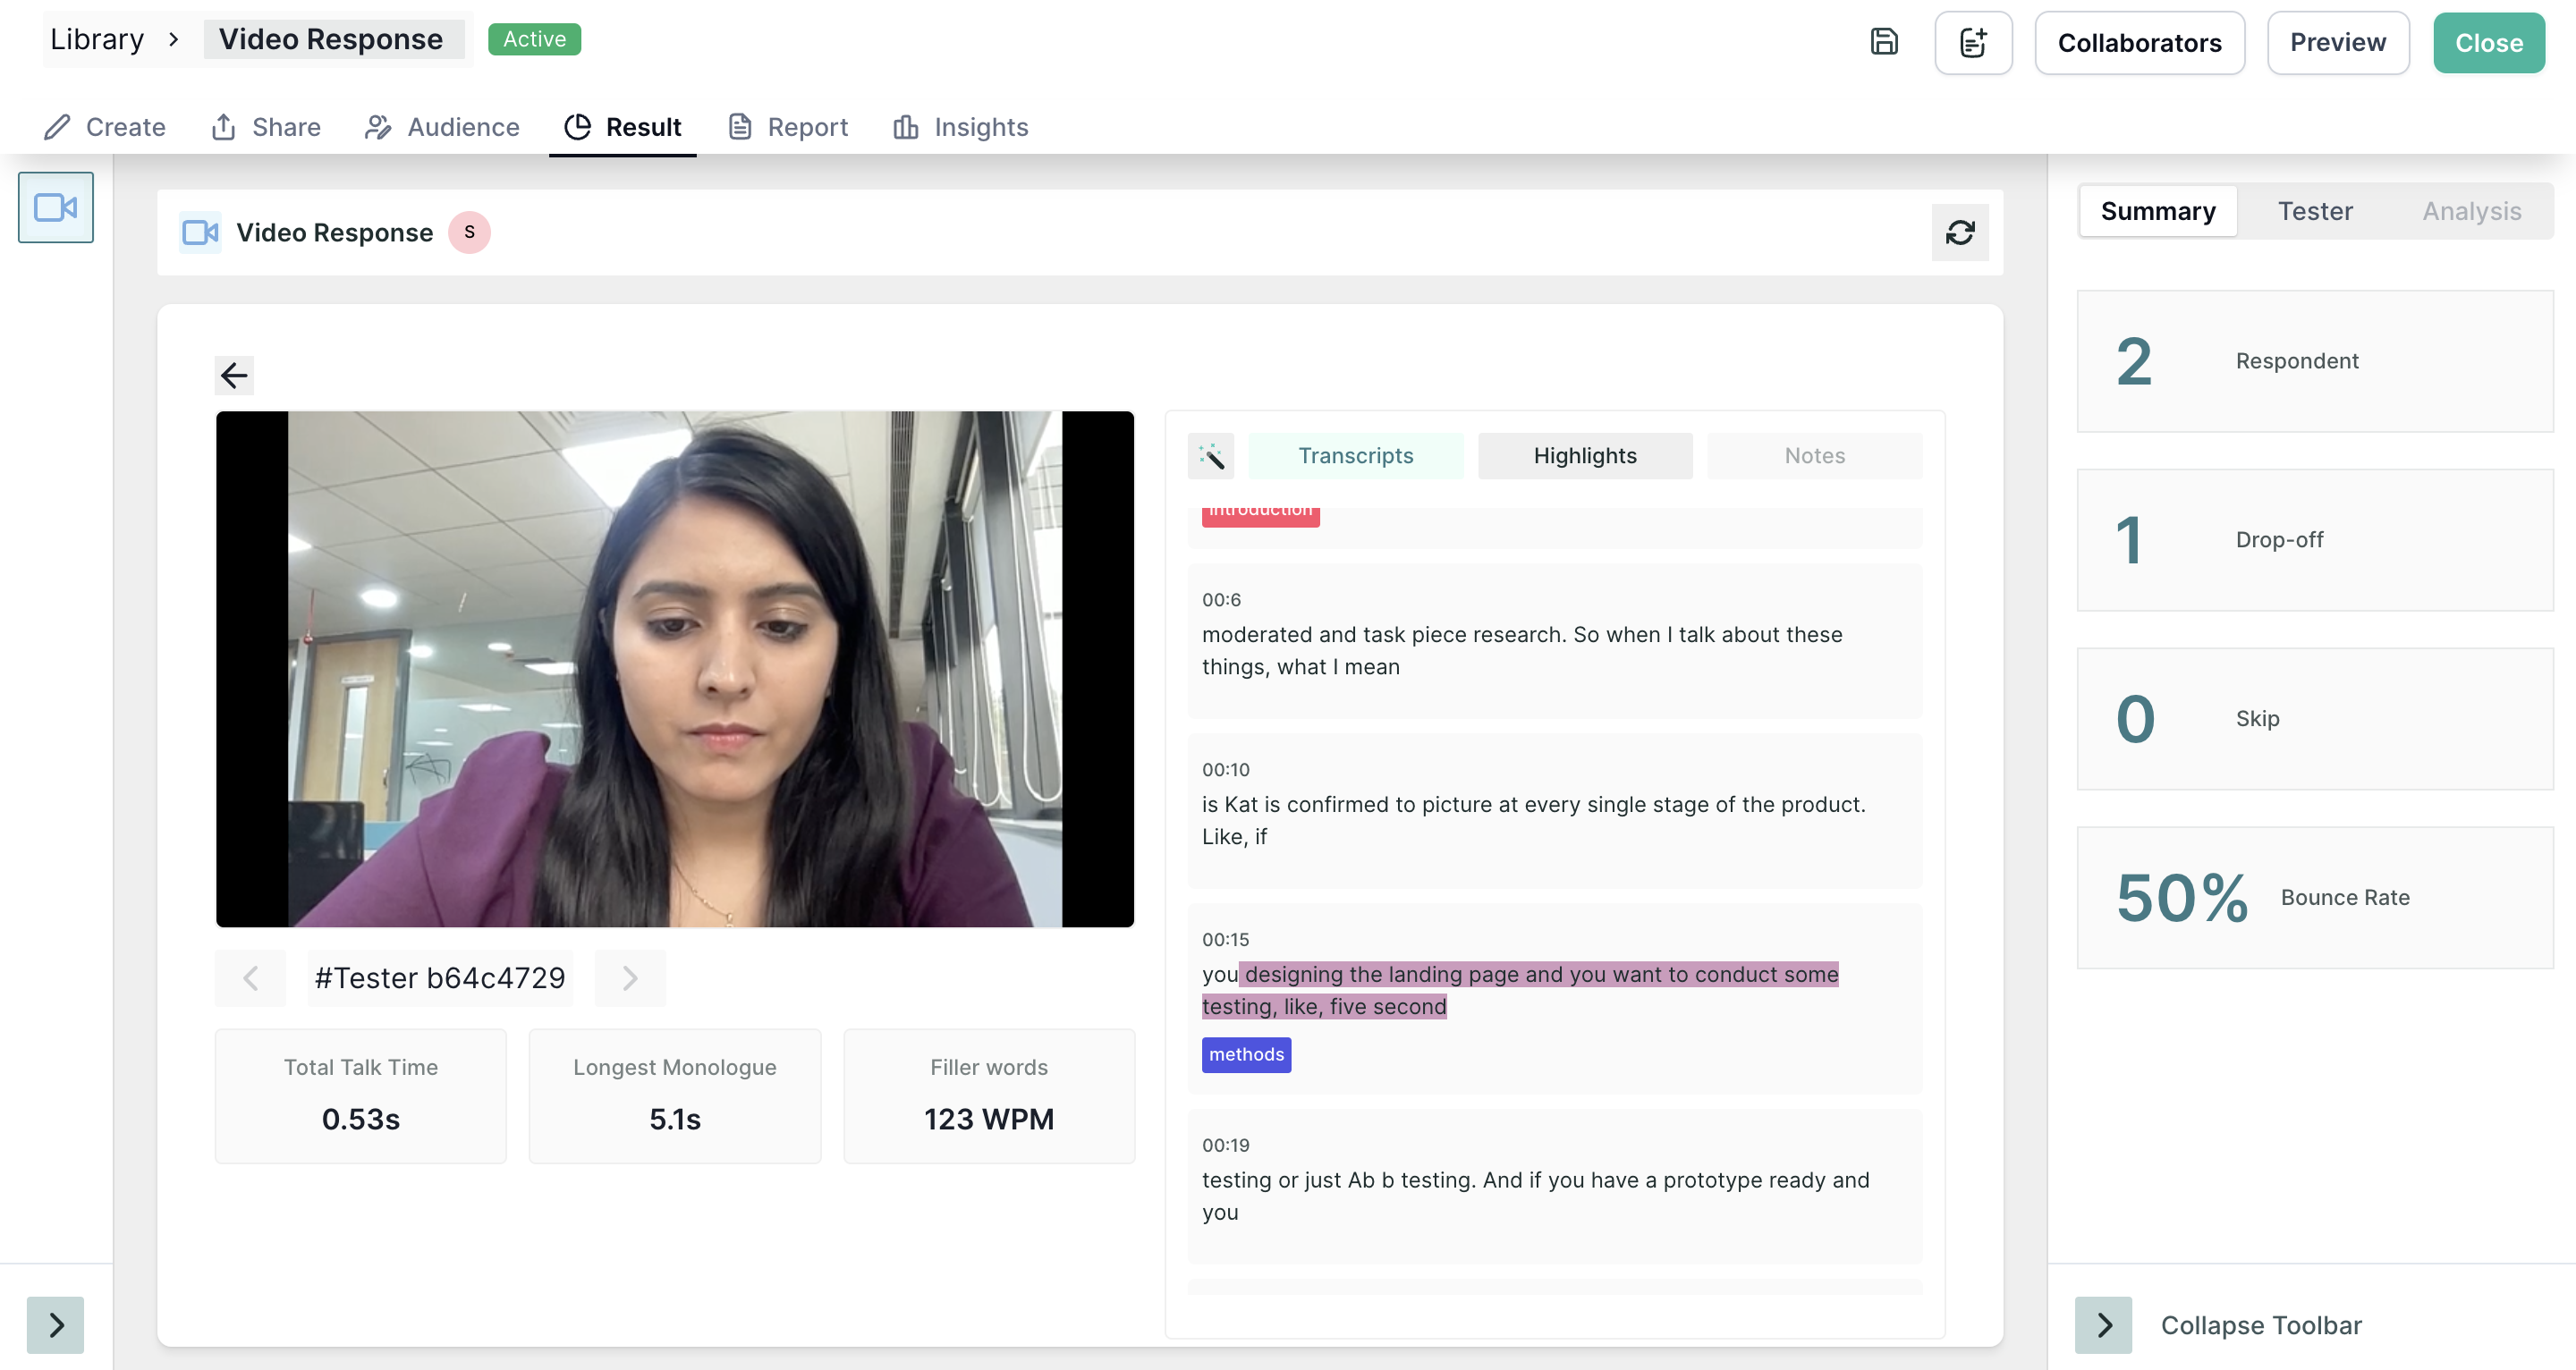
- Media Player: The media player is where you can play the video.
- Total Talk Time: The overall duration of the respondent's spoken content.
- Longest Monologue: The length of the respondent's most extended uninterrupted speech.
- Filler Words: Analysis of filler words (e.g., "um," "uh") used in the response.
- Emotion Distribution: Insights into the emotional expressions conveyed during the response.
- Transcript: A written text version of the spoken content.
- Highlights: You can select specific parts of the transcript and create highlights, which can be used to reference important topics, keep track of action items, or share specific sections with other team members.