Conduct Moderated Testing using Session Block In Qatalyst
In Qatalyst, you can conduct moderated research by scheduling a meeting online using a session block. Moderated research hinges on the concept of guiding participants through tasks and prompting them to articulate their thoughts aloud as they navigate a product or service. This dynamic approach facilitates a comprehensive understanding of user behaviour as participants verbalize their actions and reactions in real time. Additionally, moderators have the opportunity to pose follow-up questions, delving deeper into participants' perspectives and extracting valuable insights.
Follow these steps to create a successful interview study:
Step 1: Log In and Start
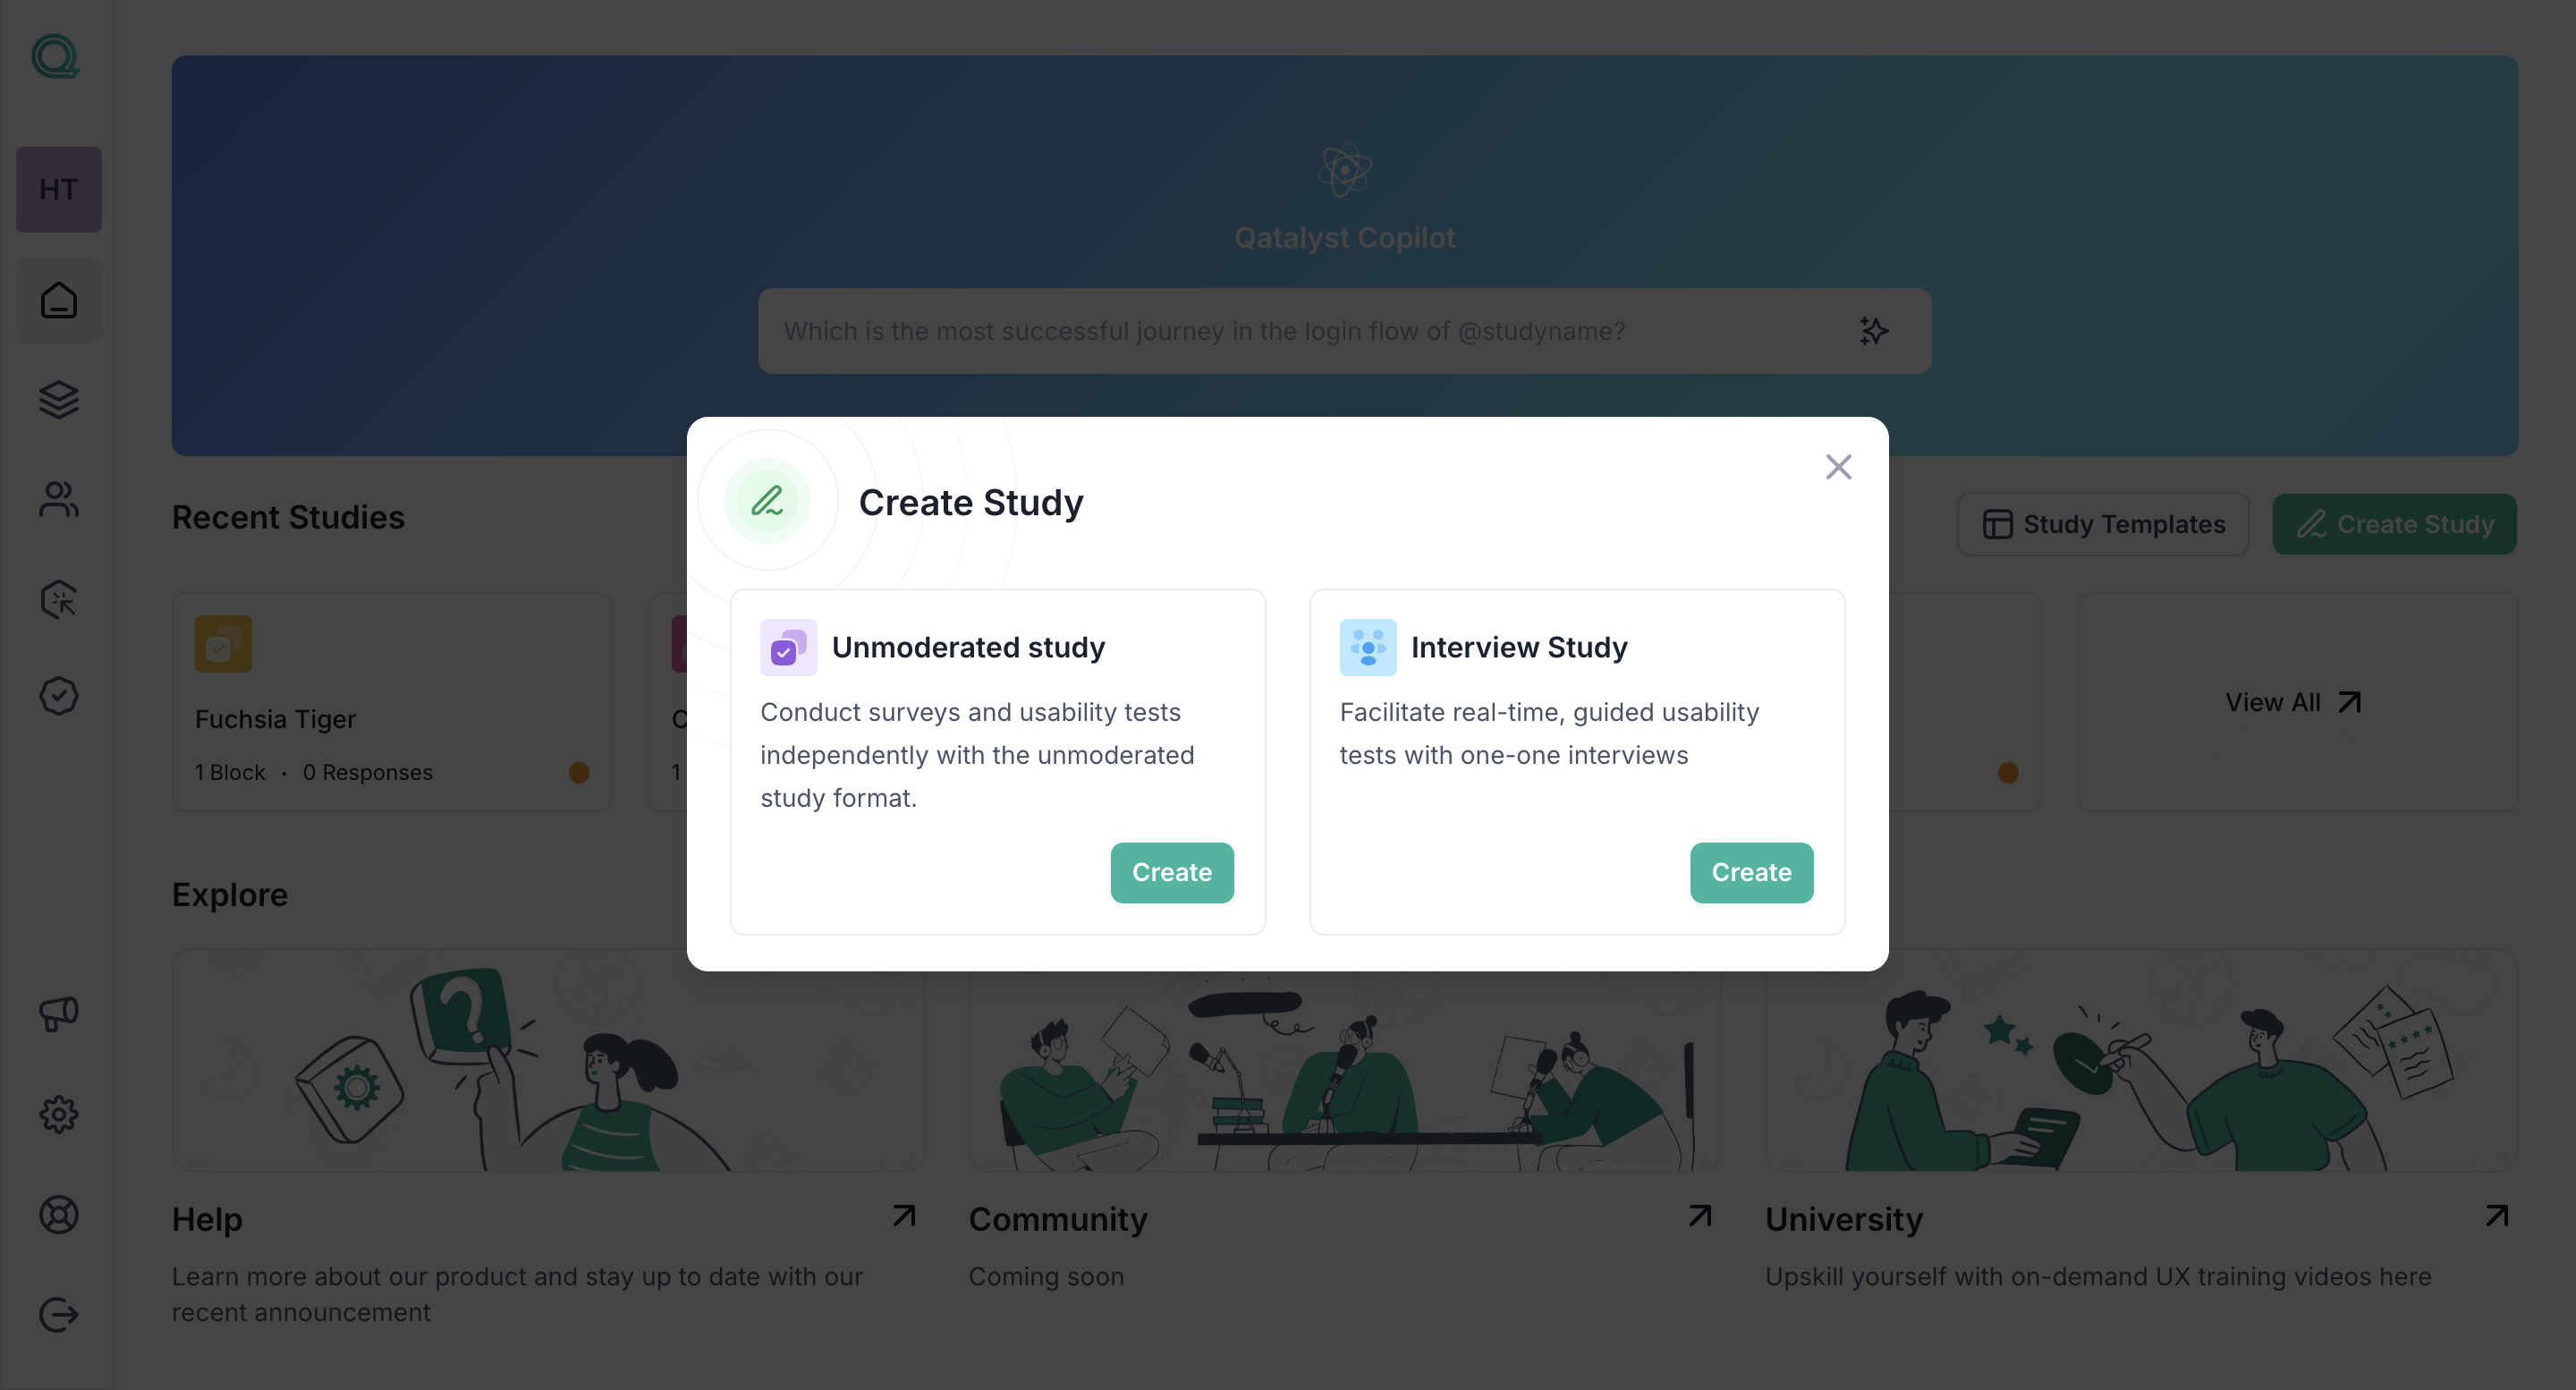
Log in to your Qatalyst account, which will direct you to the dashboard. From the dashboard, click on the "Create New Study" button to initiate the process of creating a new study.

Step 2: Select Study Type
1. Choose the "Interview Study" option to create a moderated session.
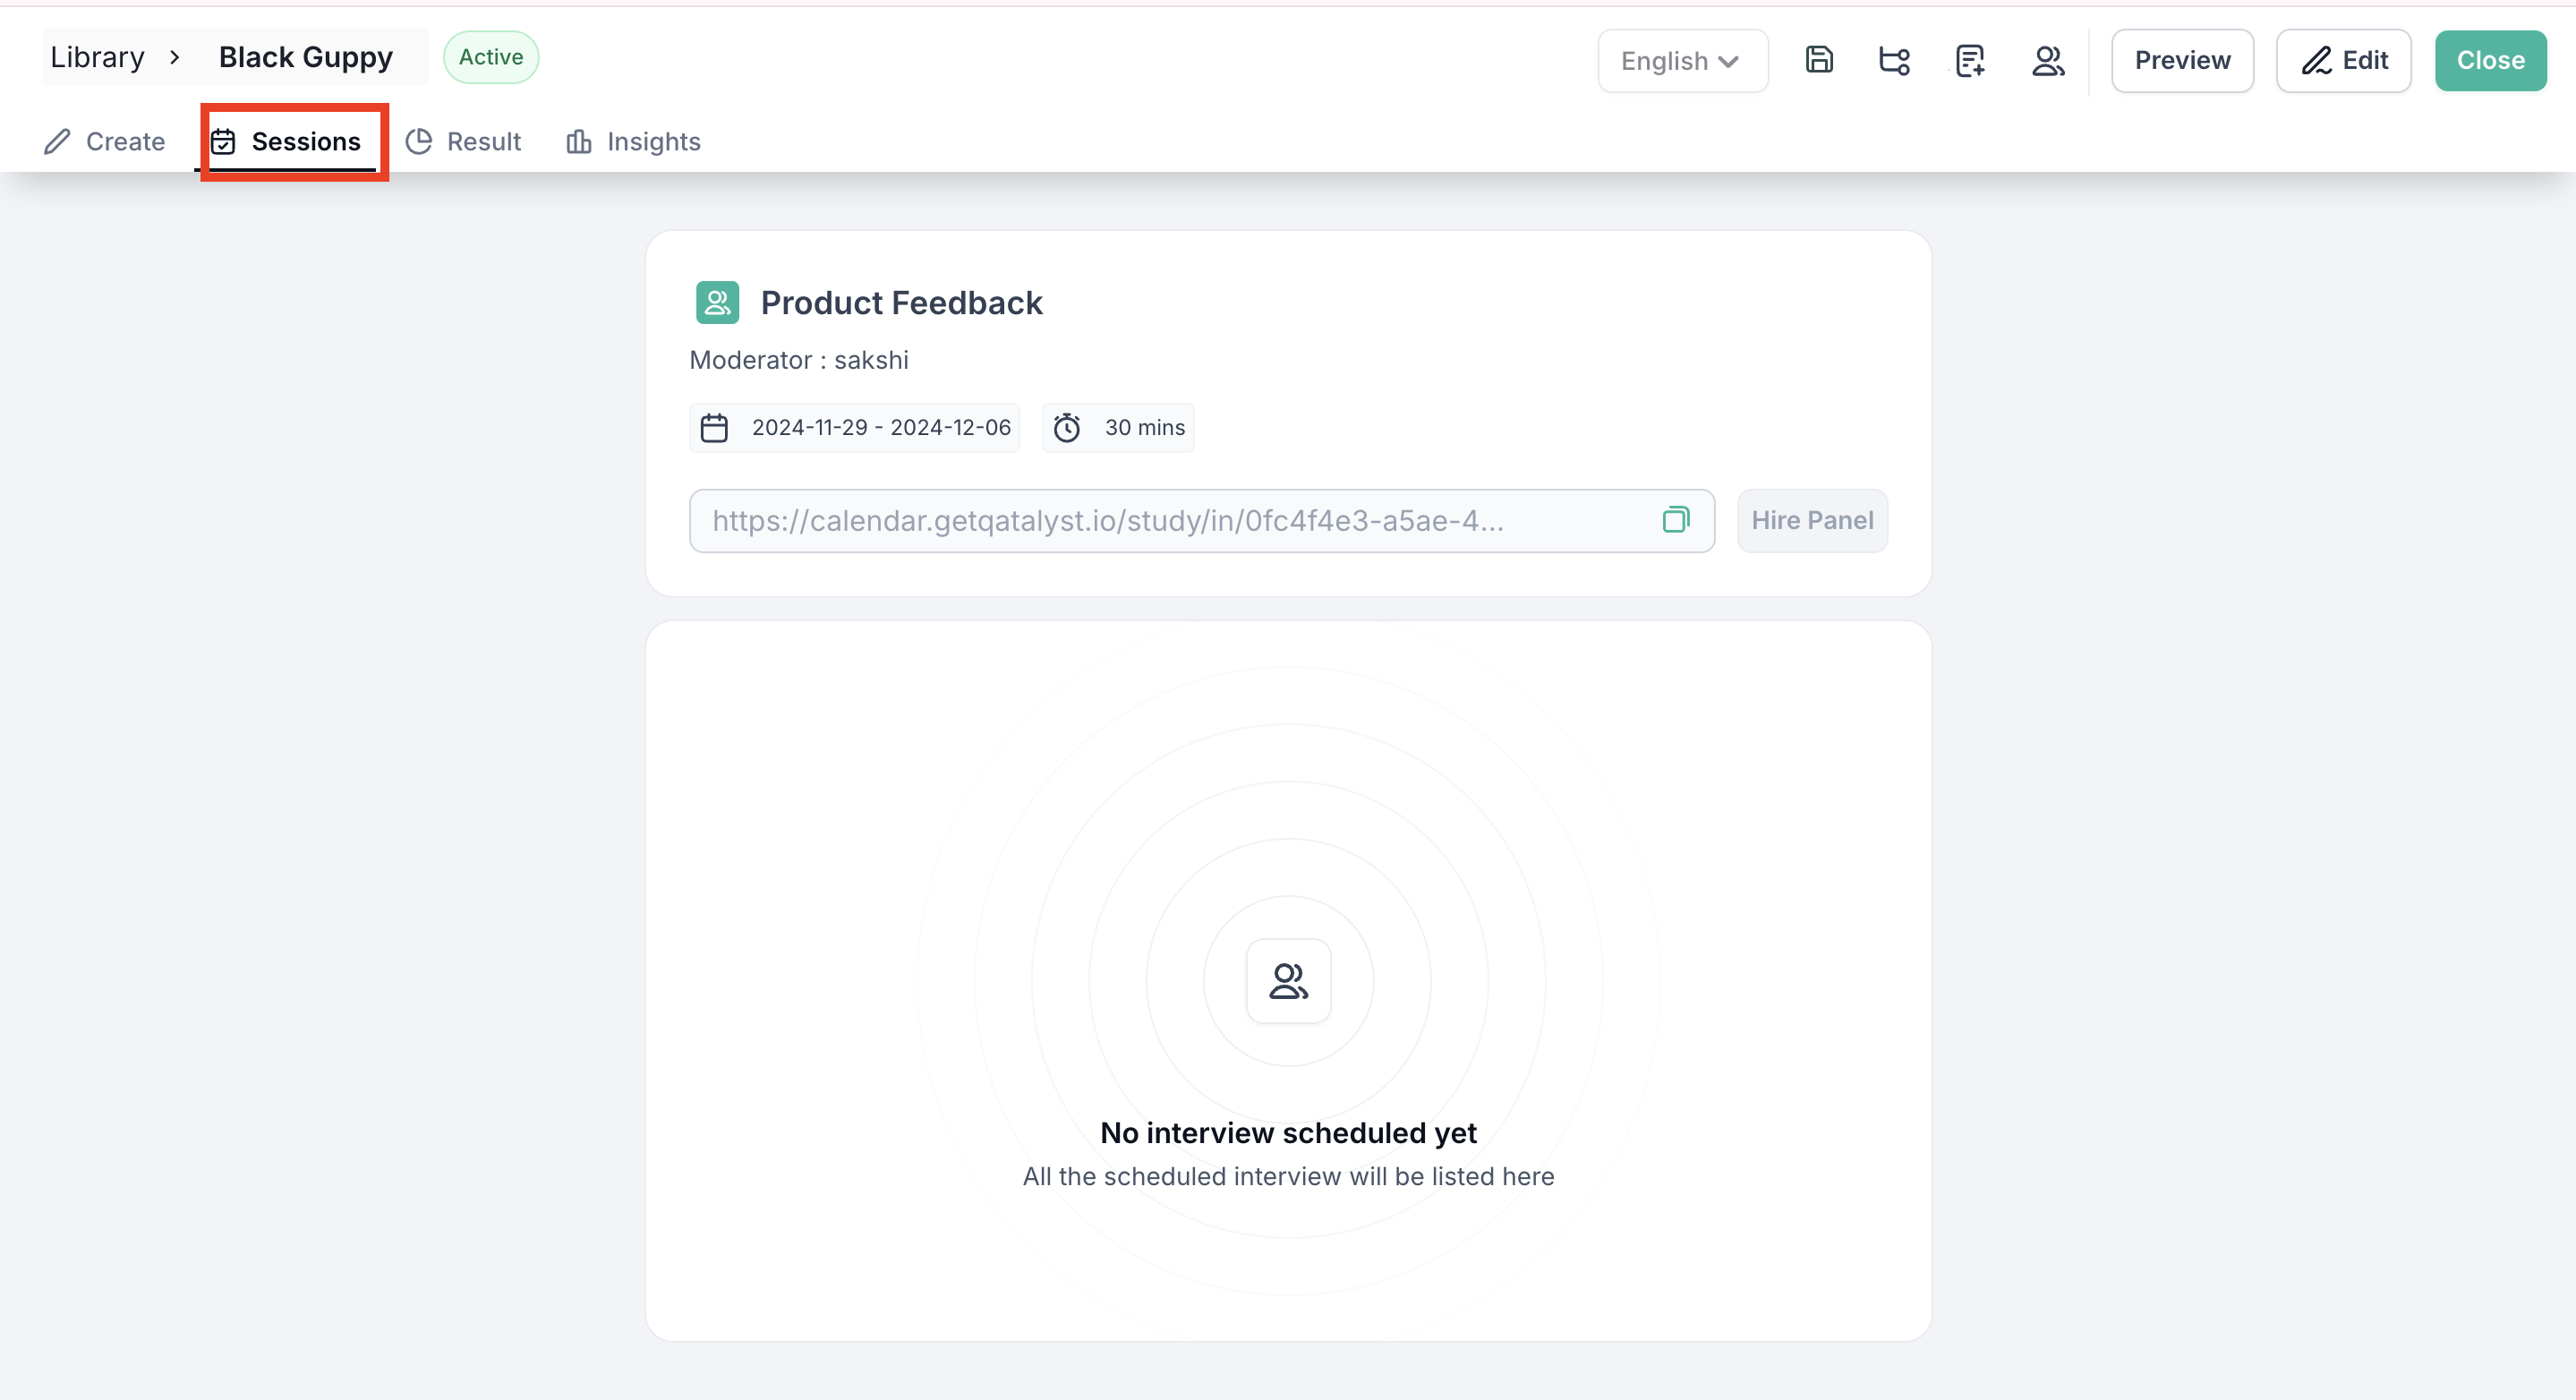
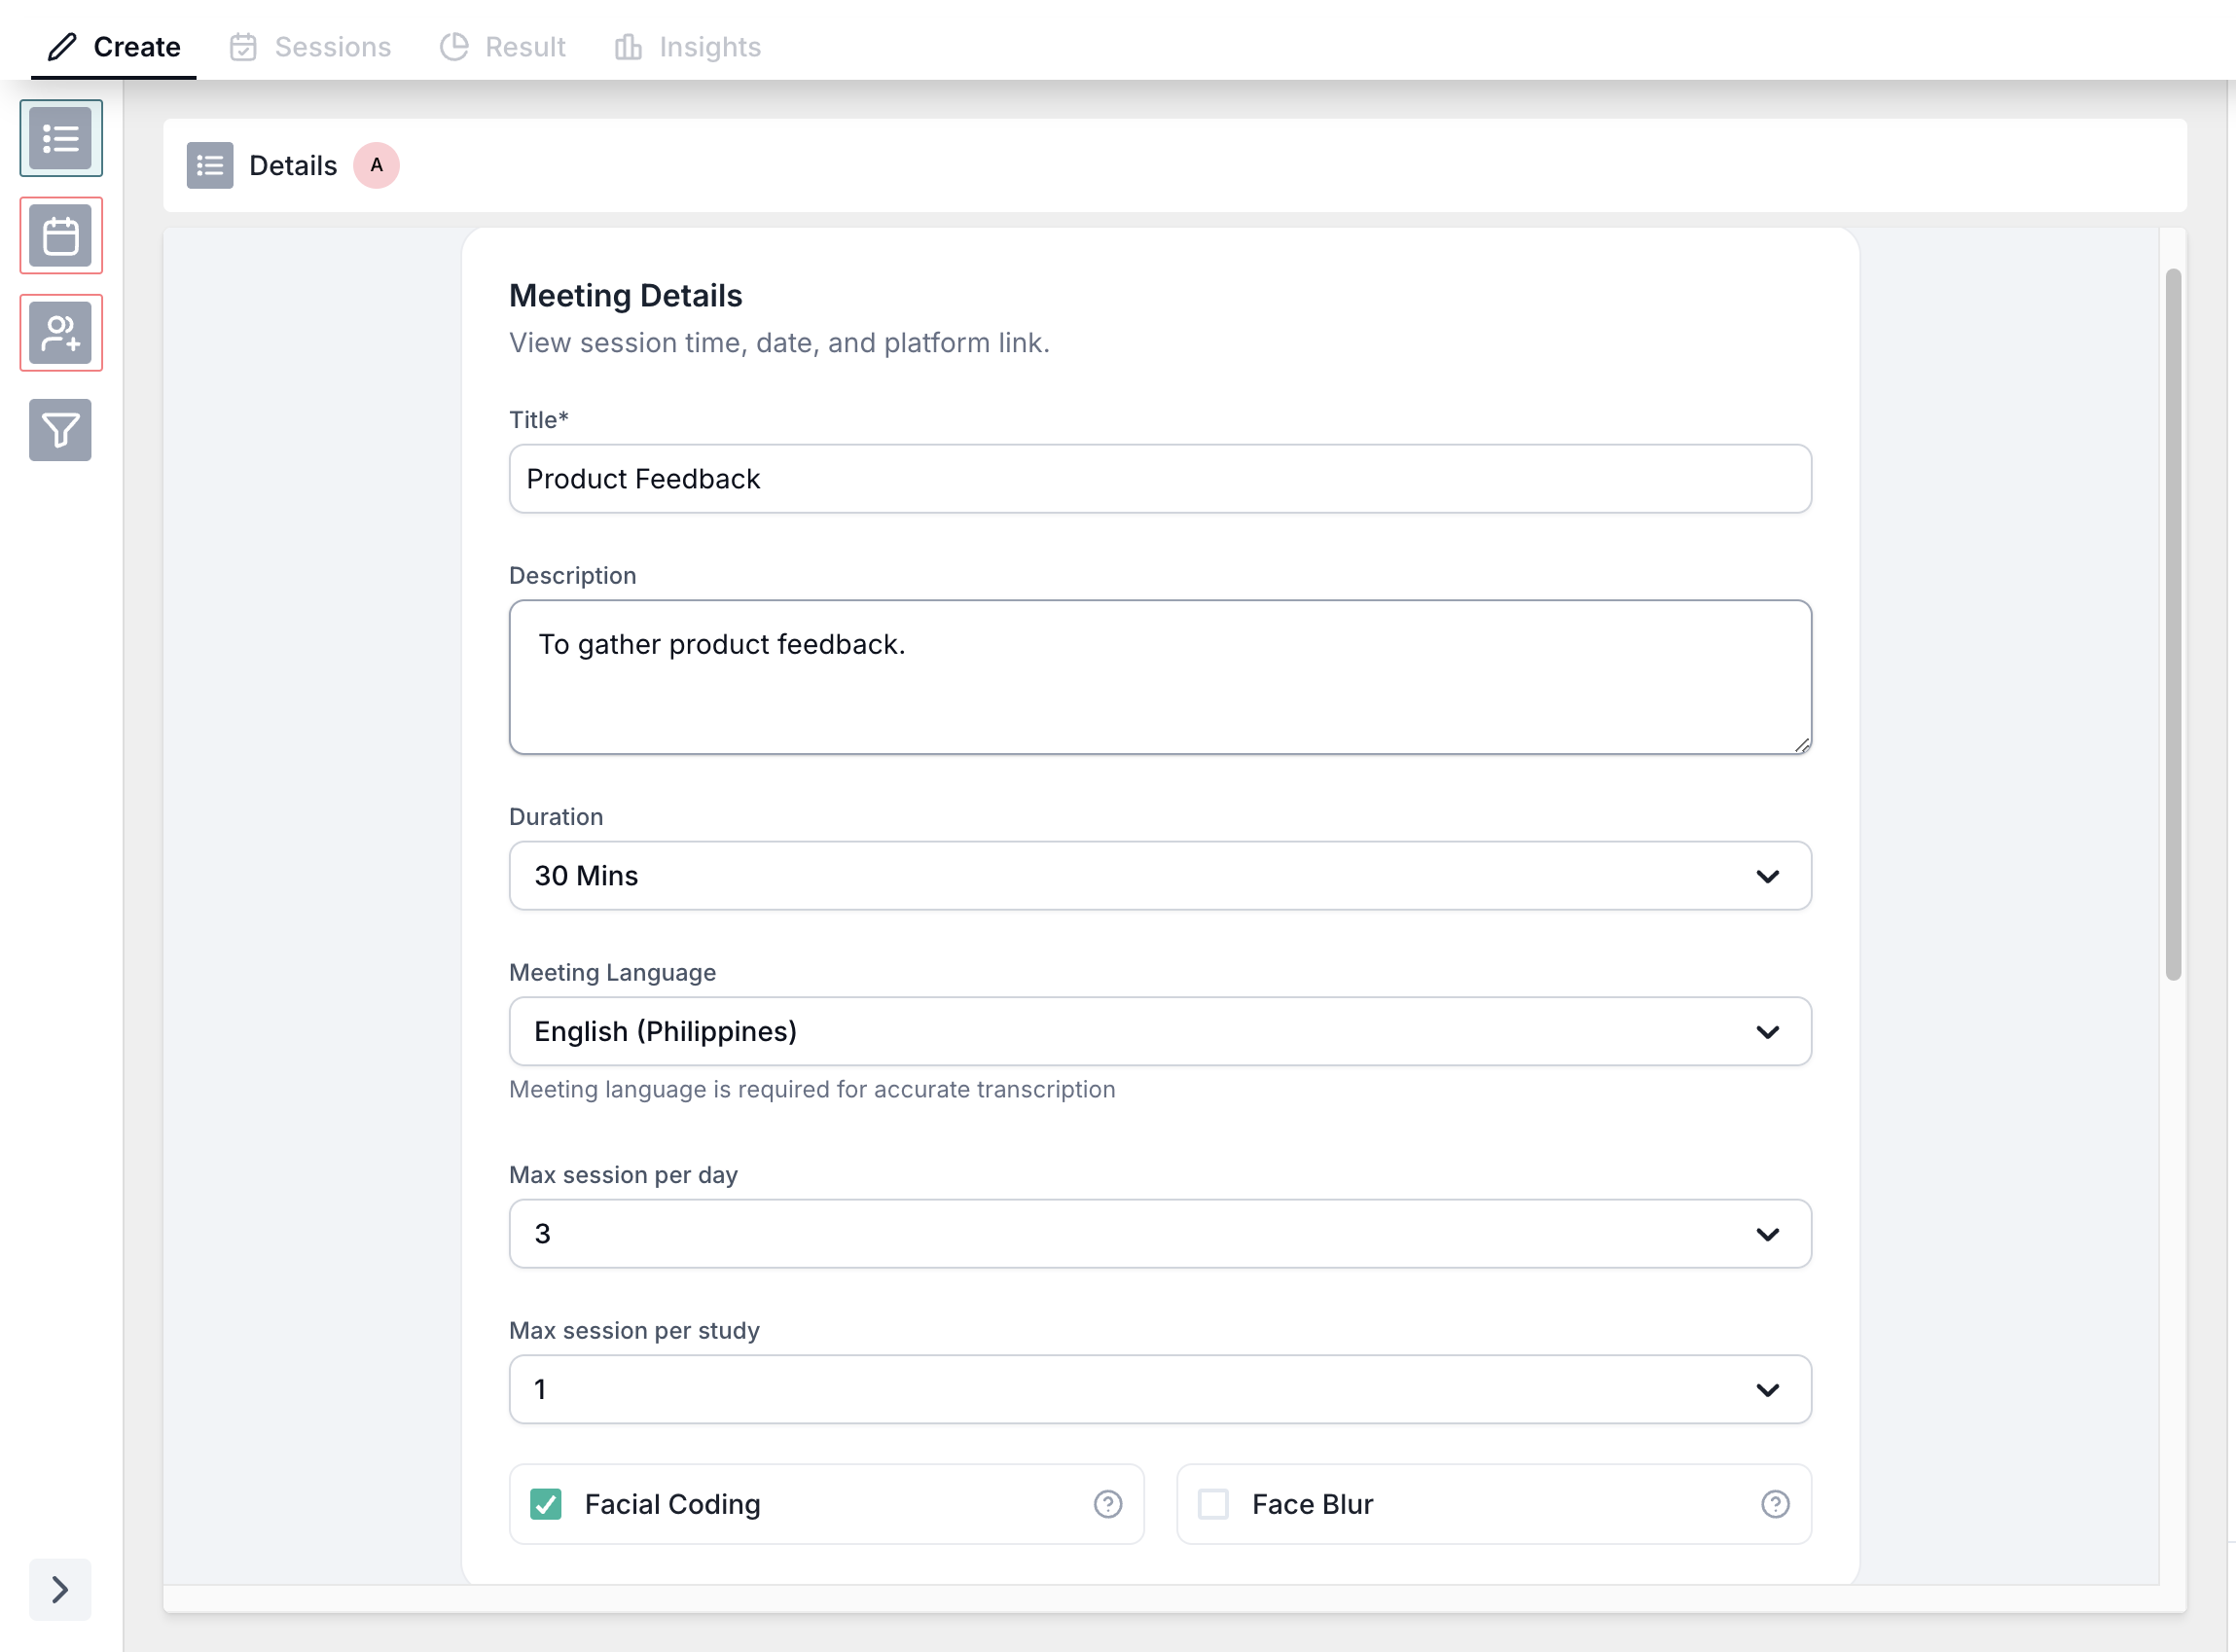
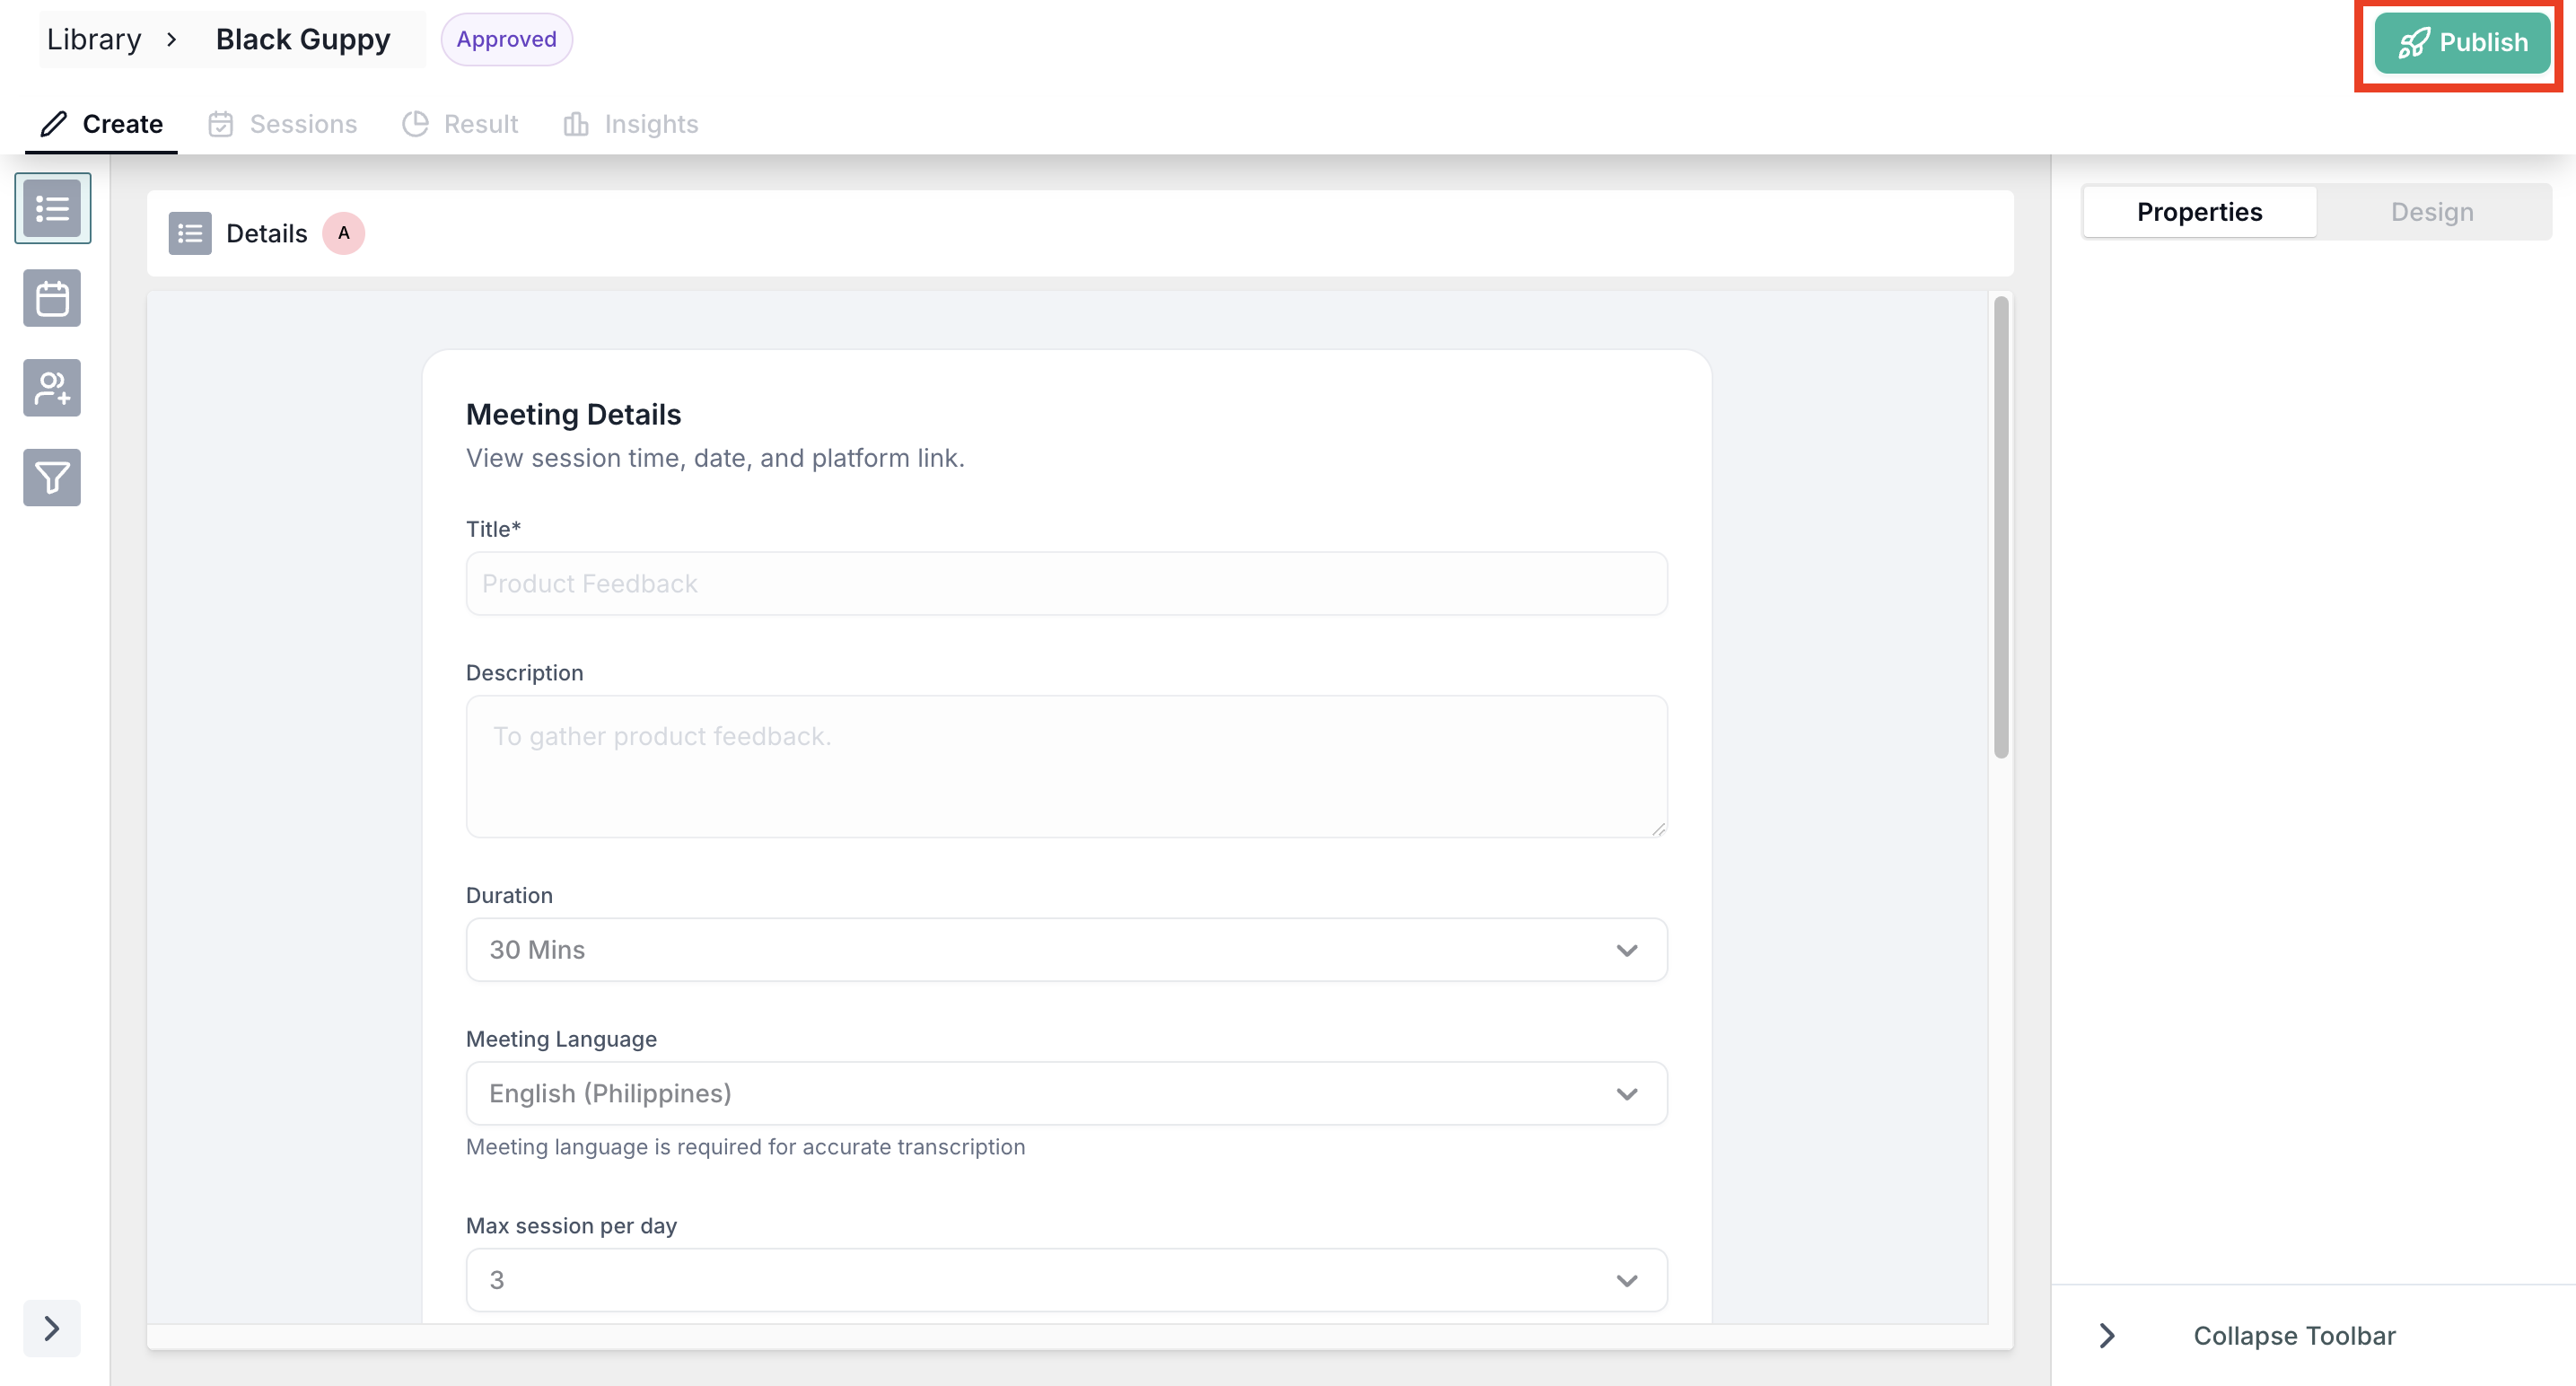
- Meeting Details
- Availability
- Participants
- Screening
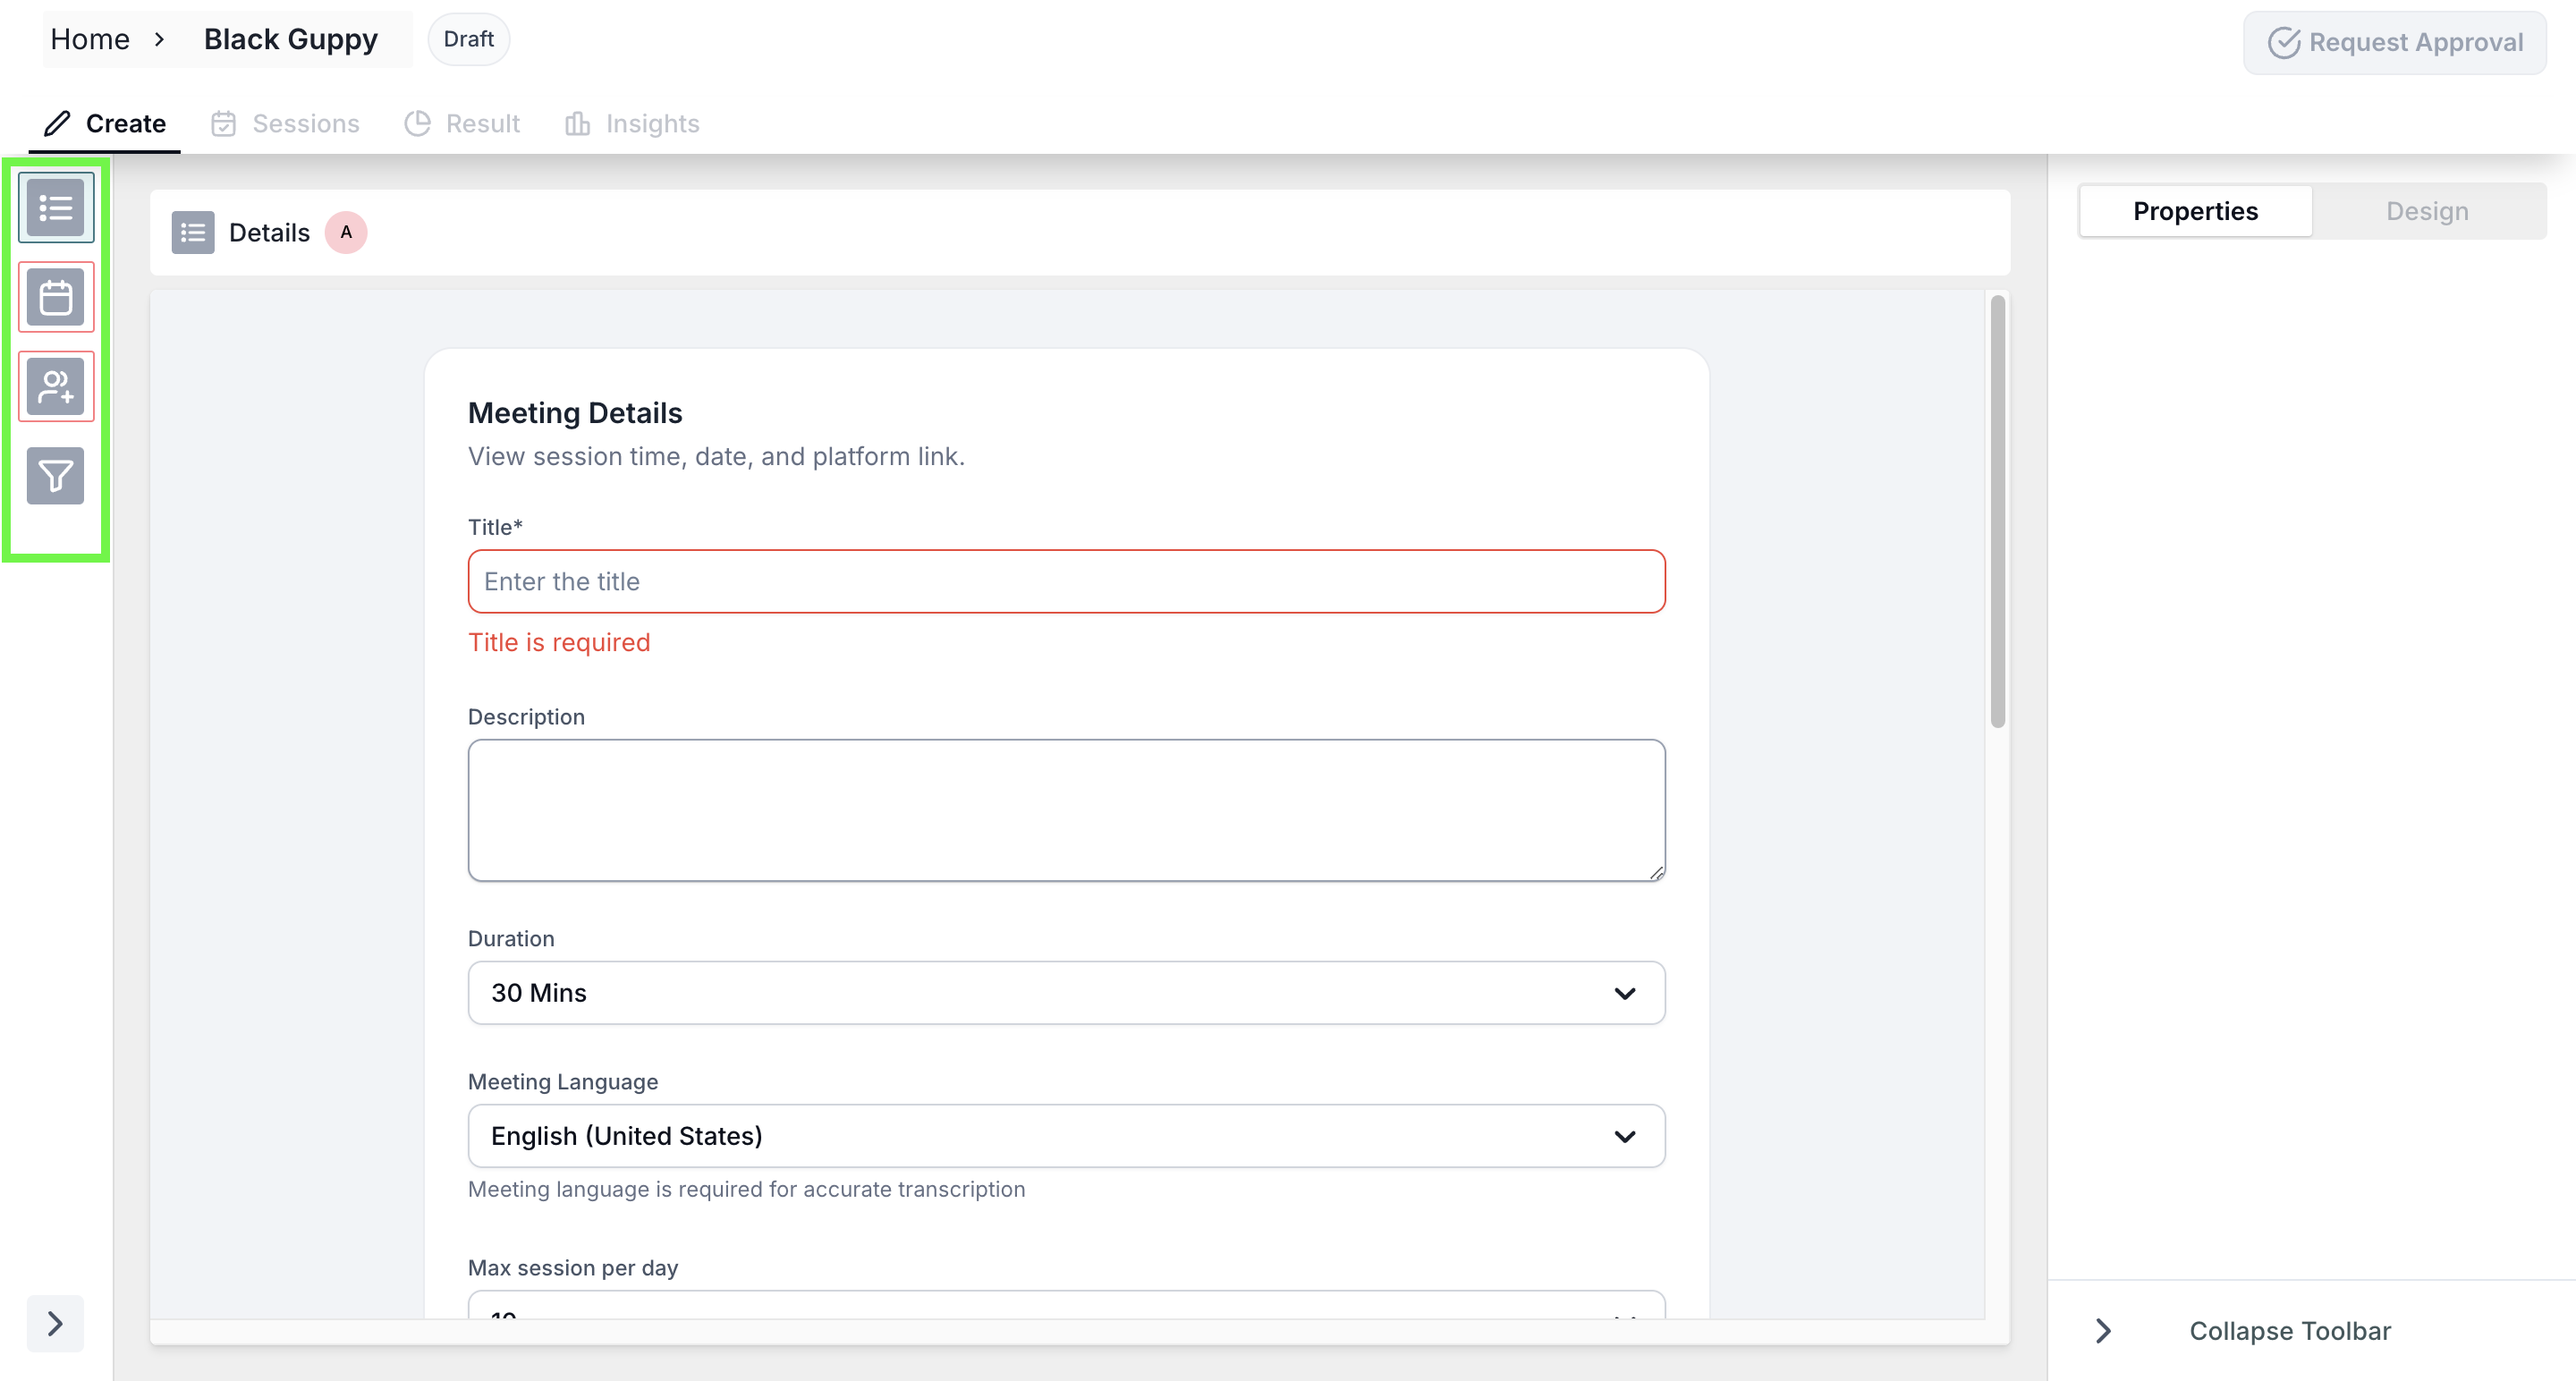
Section 1: Meeting Details
Fill in the following details:
- Meeting Title & Description: Enter a suitable title and description.
- Duration: Set the meeting duration (up to 180 minutes).
- Language: Choose the meeting language for accurate transcription.
- Max Sessions per Day: Specify the number of sessions you can conduct in a day.
- Max Sessions per Study: Define how many participants can book slots using the same link (e.g., selecting "2" allows two participants to book).
- Facial Coding: Enable to capture emotional insights.
- Face Blur: Blur participants' faces if required.
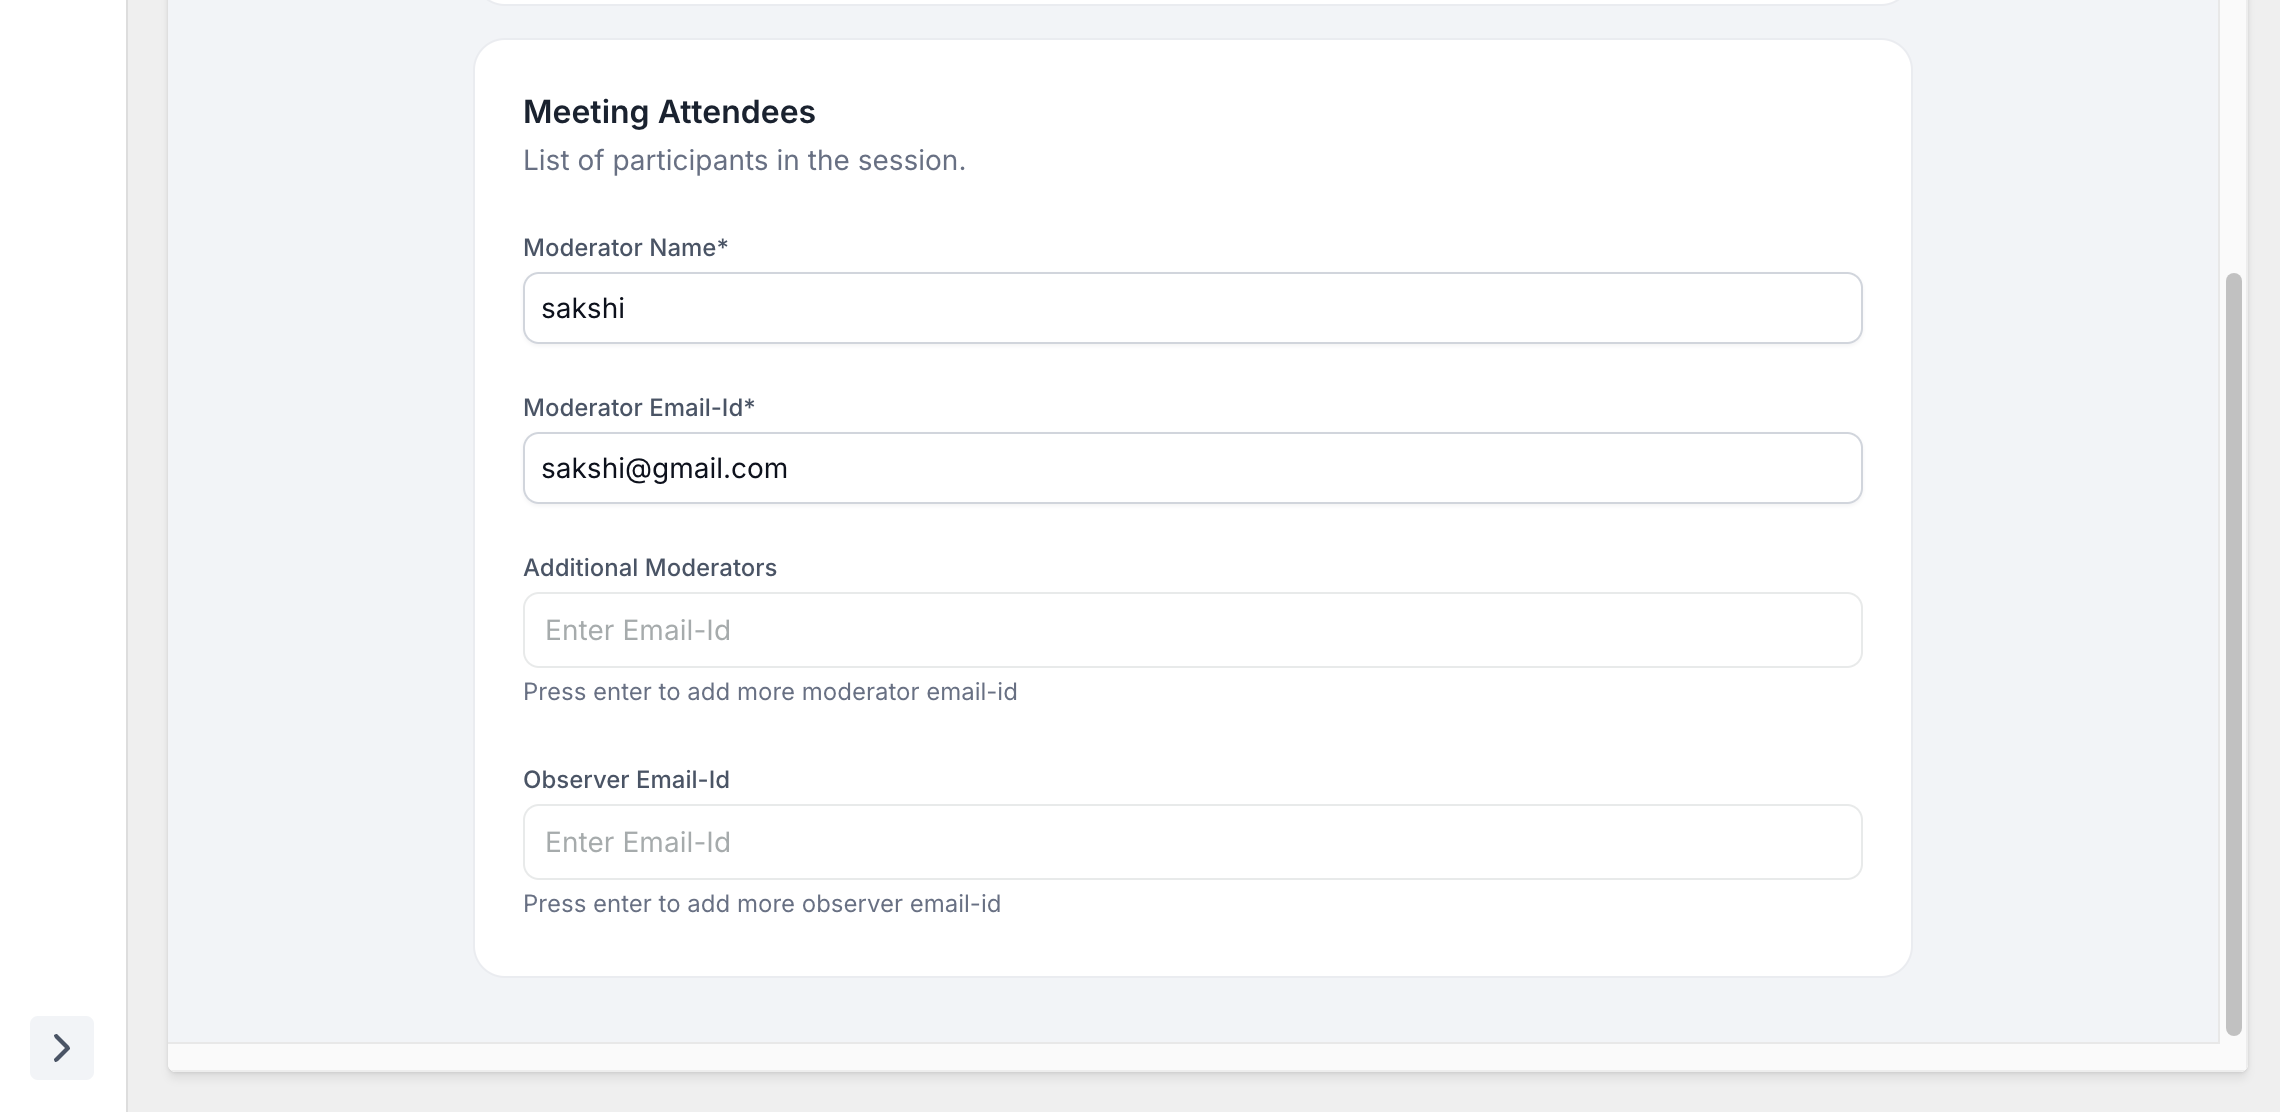
- Moderator Details: Add the moderator's name and email.
- Observer Details (Optional): Include the details of any observers attending..
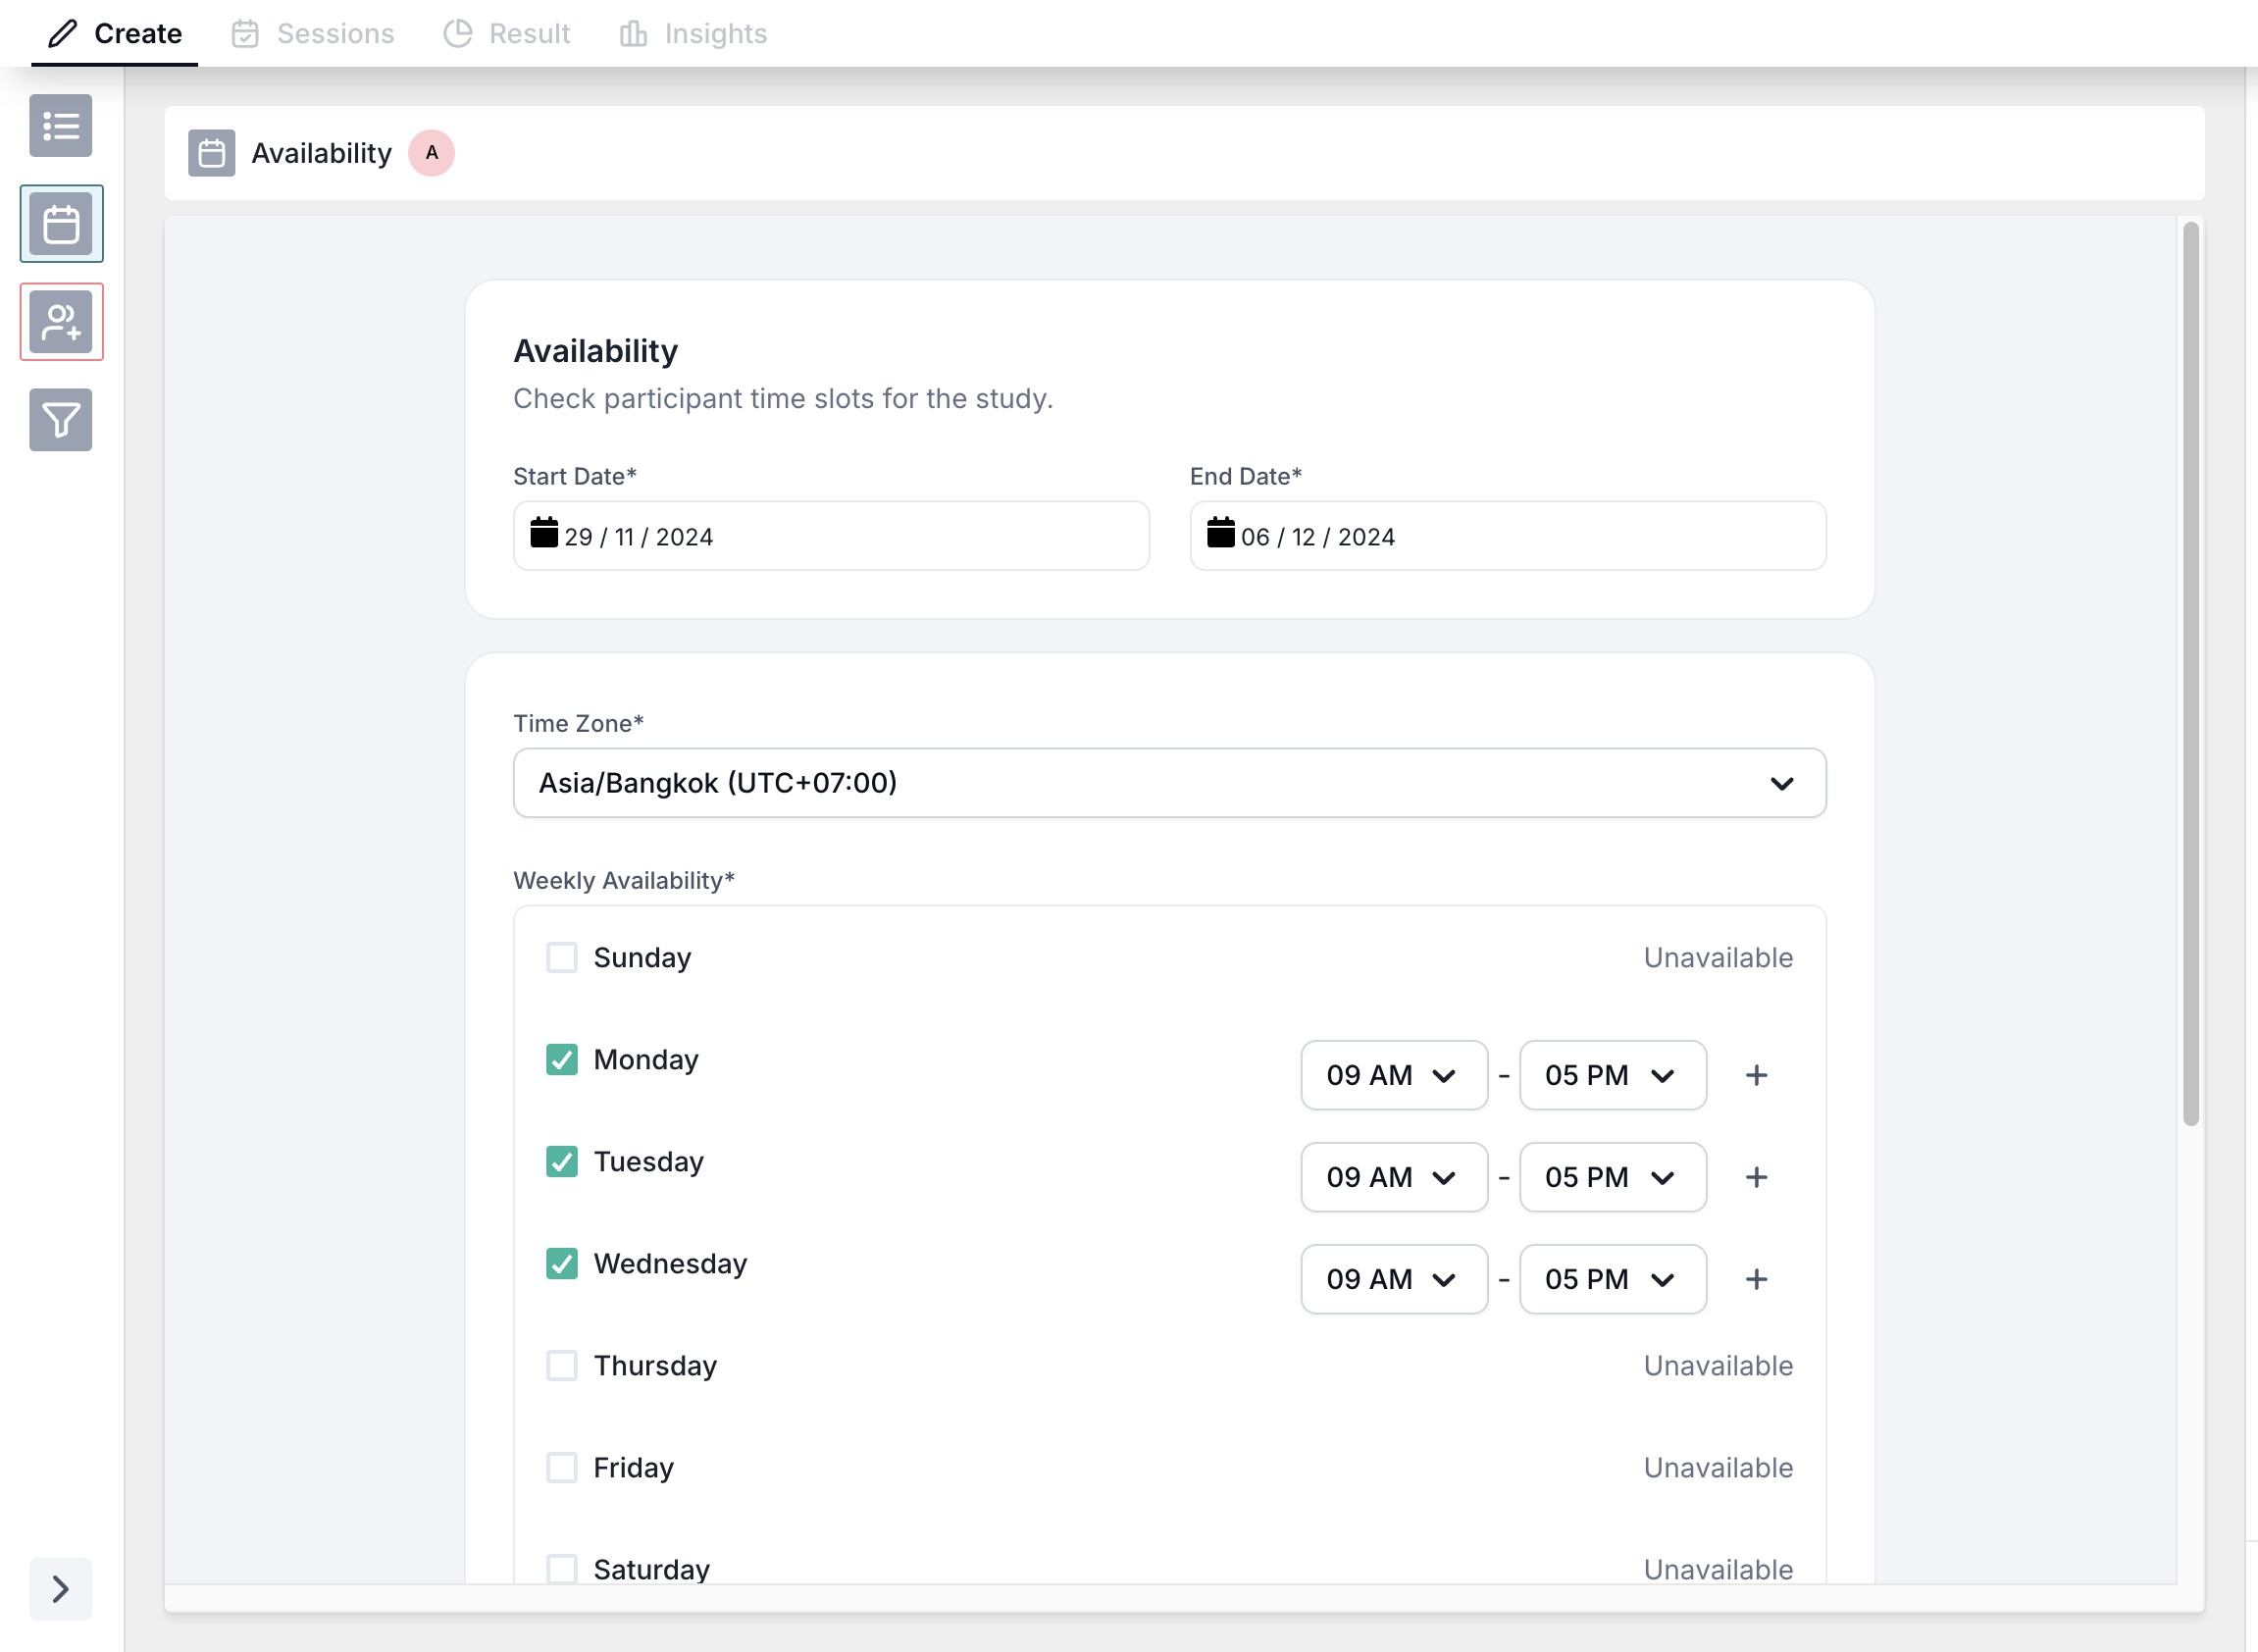
Section 2: Availability
- After completing the meeting details, proceed to the Availability Page.
- Select the dates and time slots for the meeting.
- These slots will be visible to participants, who can choose the ones that suit them best.
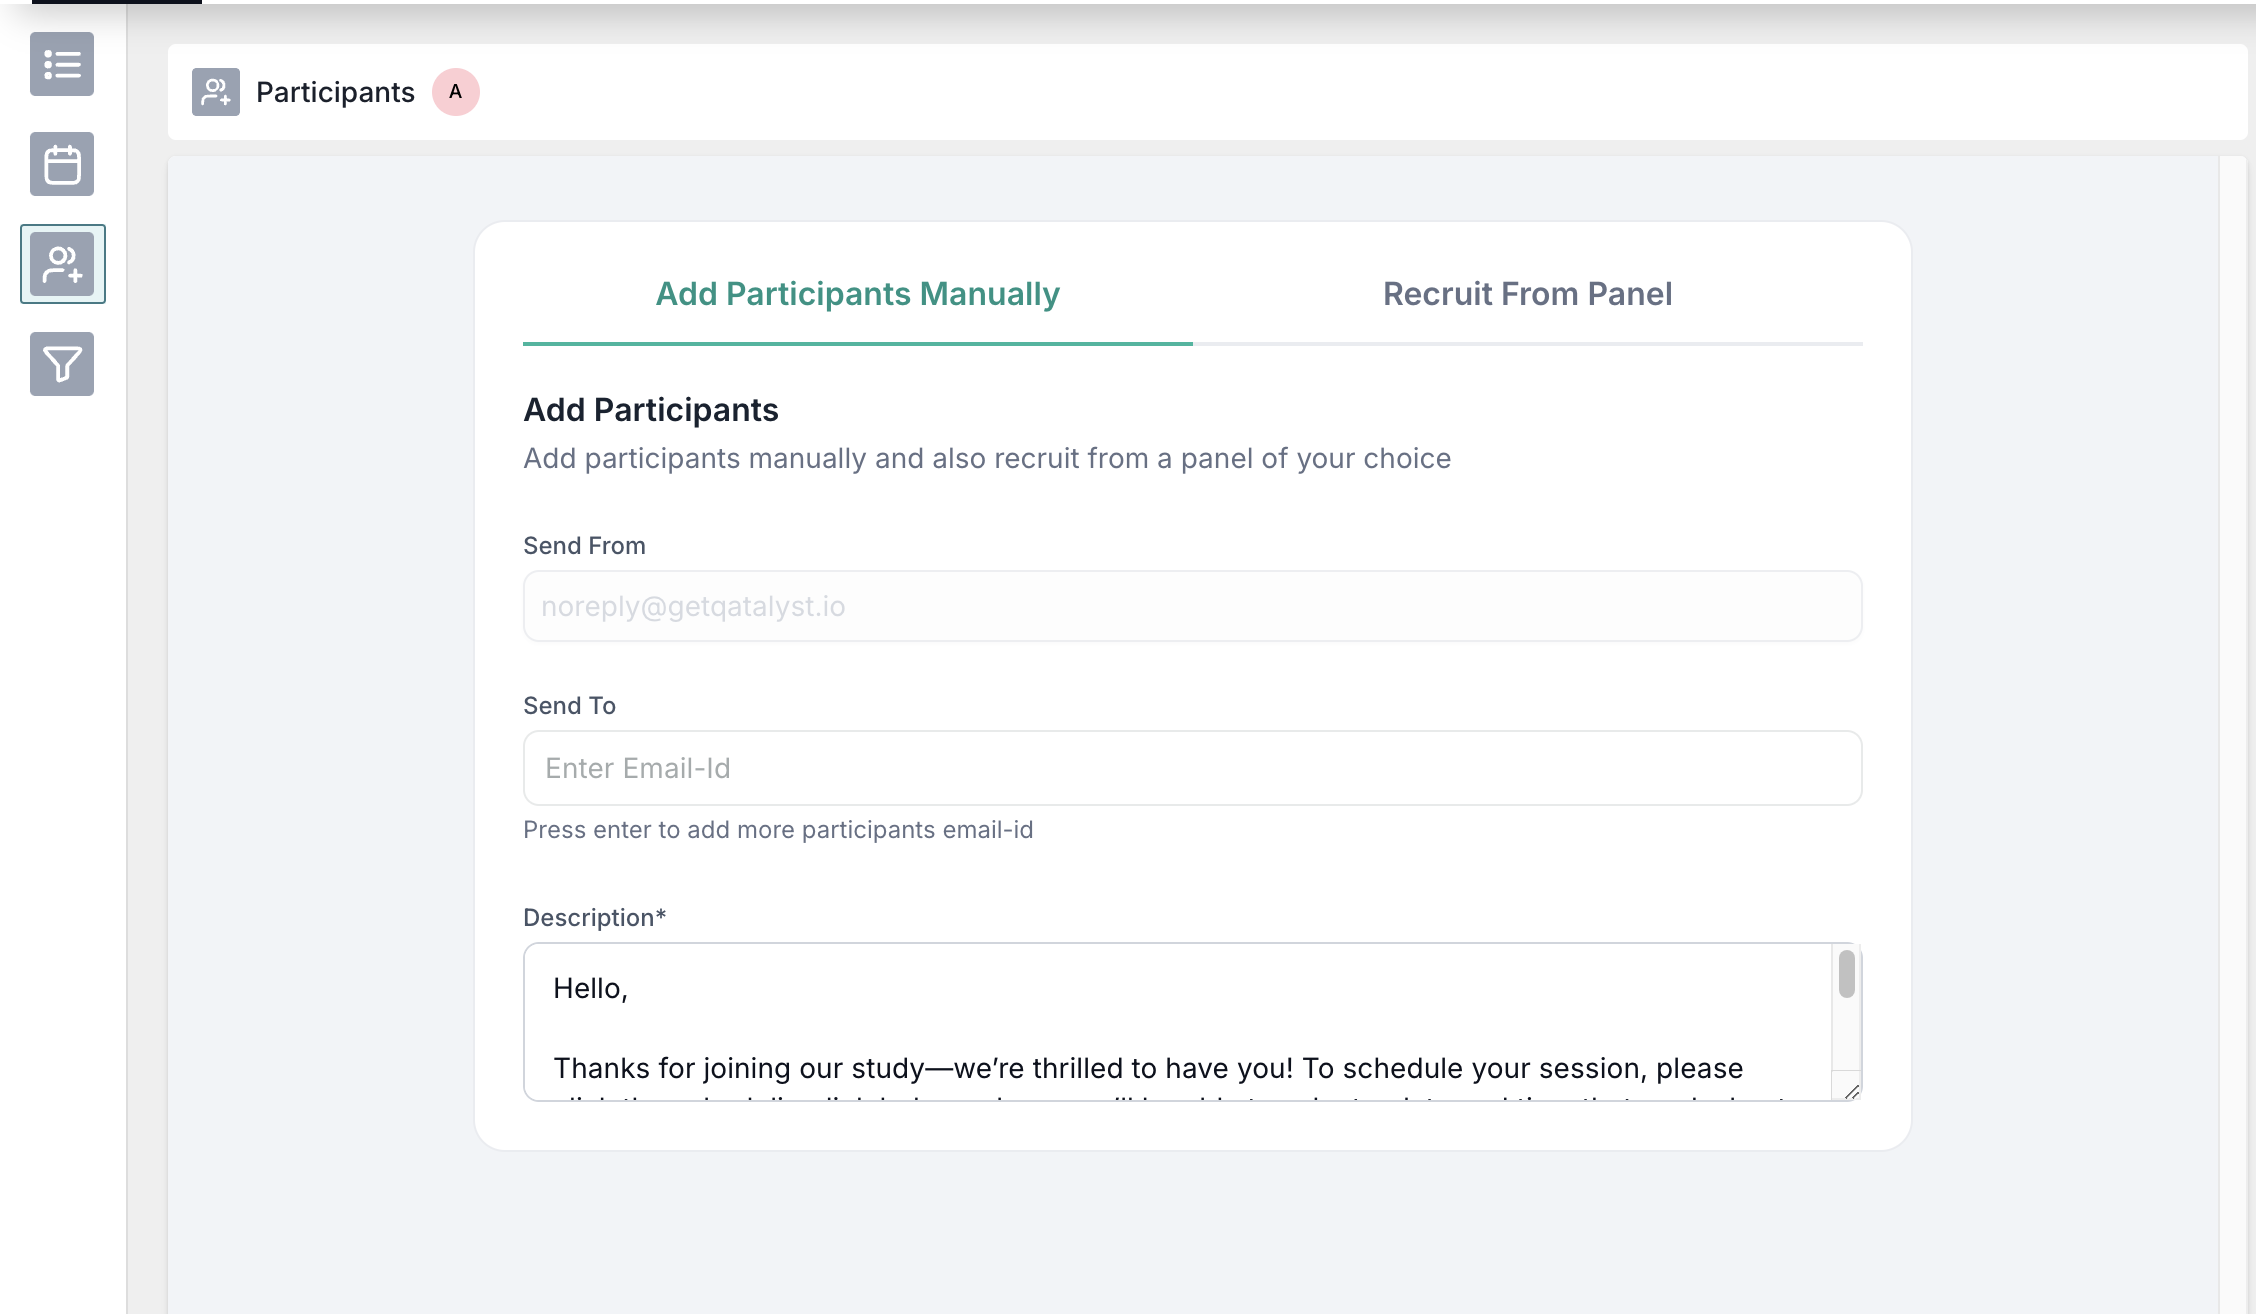
Section 3: Participants
- Invite participants manually by entering their email addresses, or
- Recruit participants from the panel (feature coming soon).
4. Screening Page
1. The Screening Page allows you to add questions to filter participants based on specific criteria before they book a slot. This ensures you select only the most relevant participants for your study.
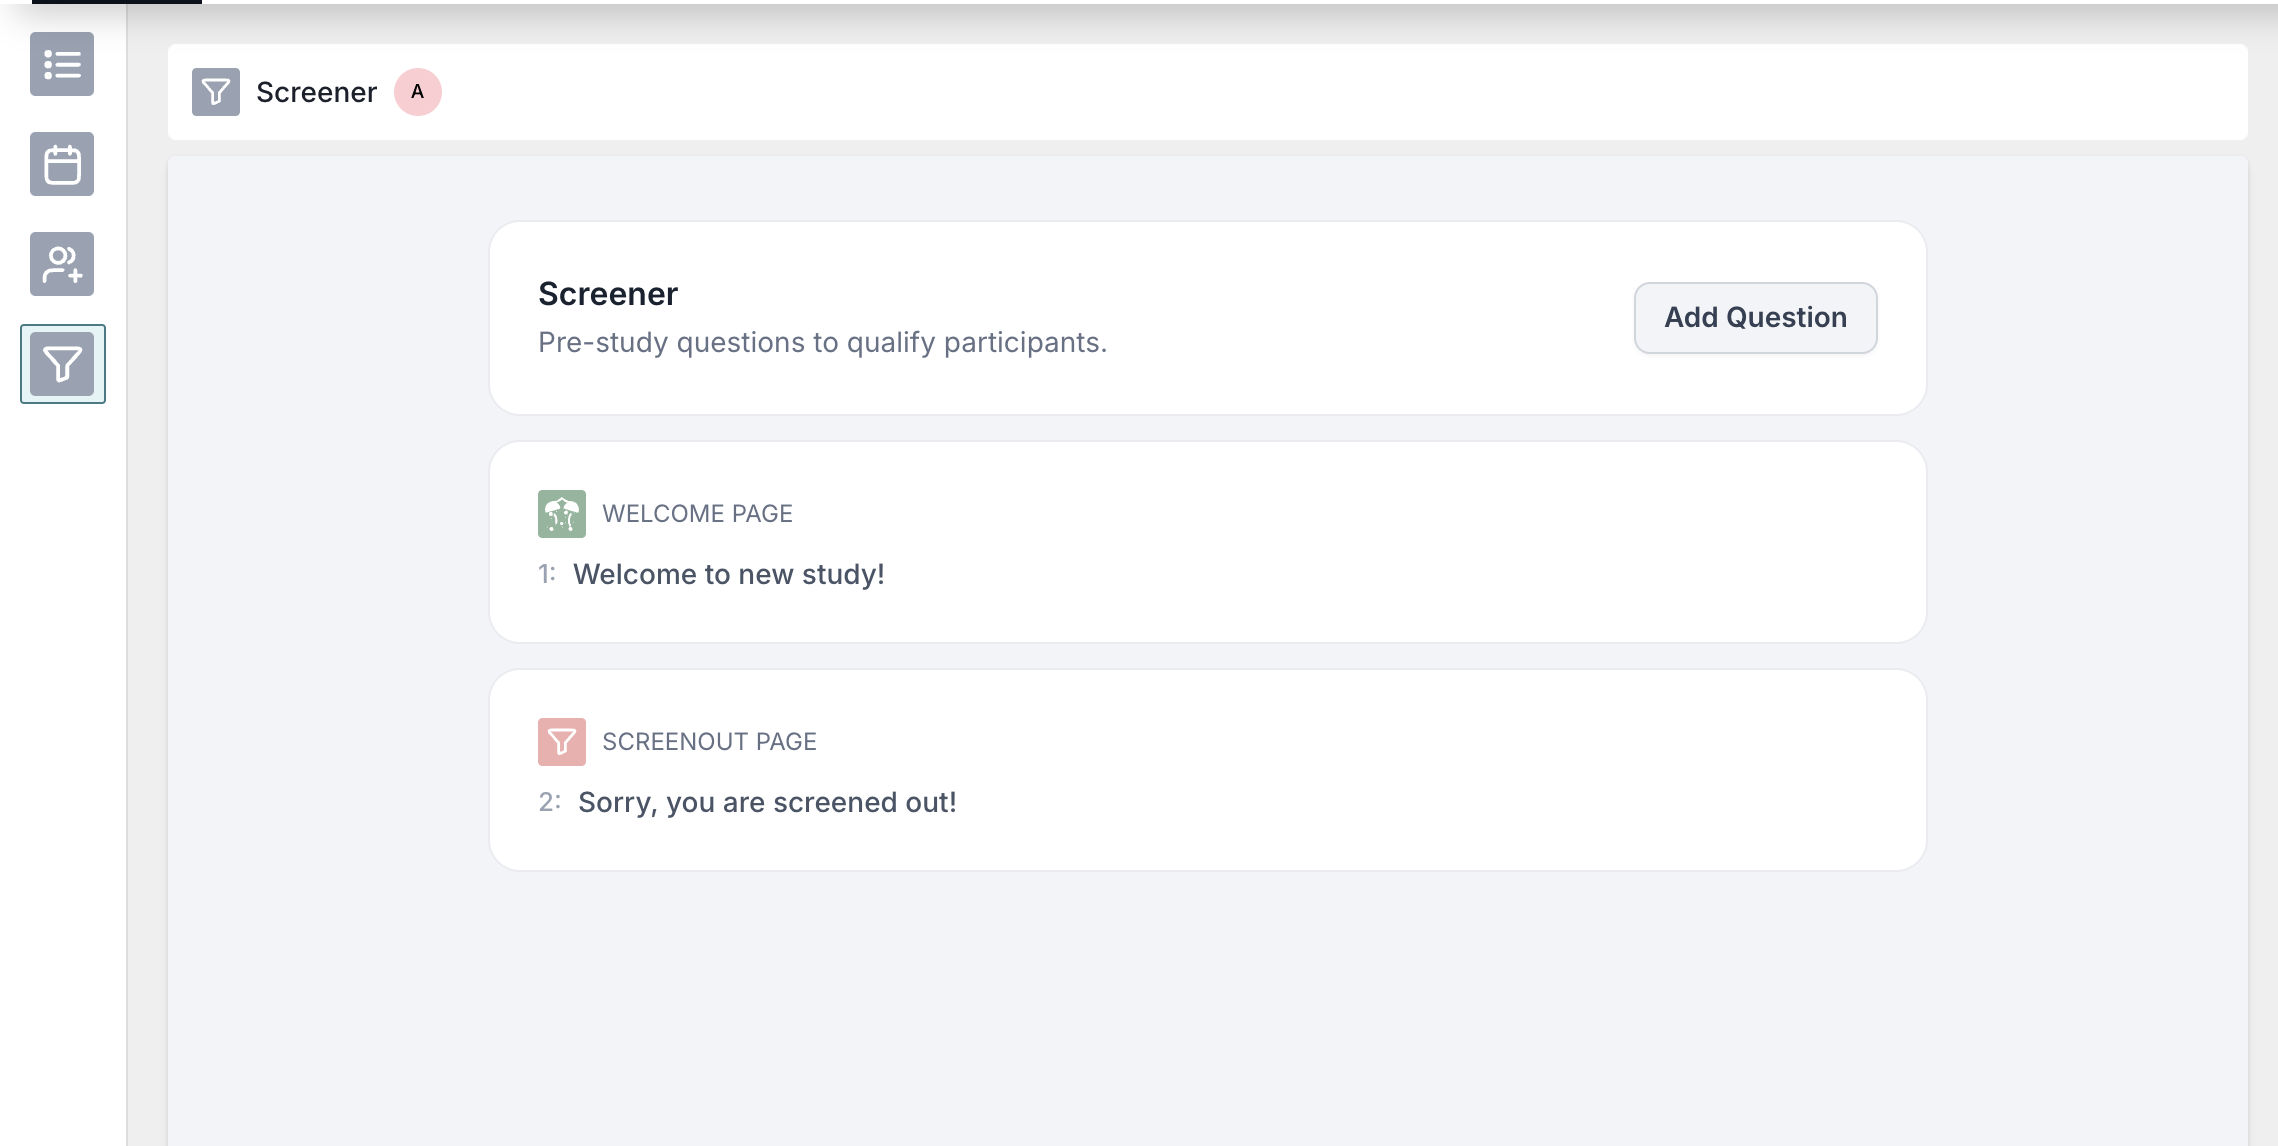
2. To add questions, click on add question and add the question and condition for screening out.

Step 3: Publish the Study
- Once all sections are complete, click "Publish".
- You’ll be directed to the session page where the study link is available.
Step 4: Share the Link
- Share the study link with participants.
- Participants can select their preferred slots, and a meeting link will be sent to them automatically.